1. Docker Component 구성하기
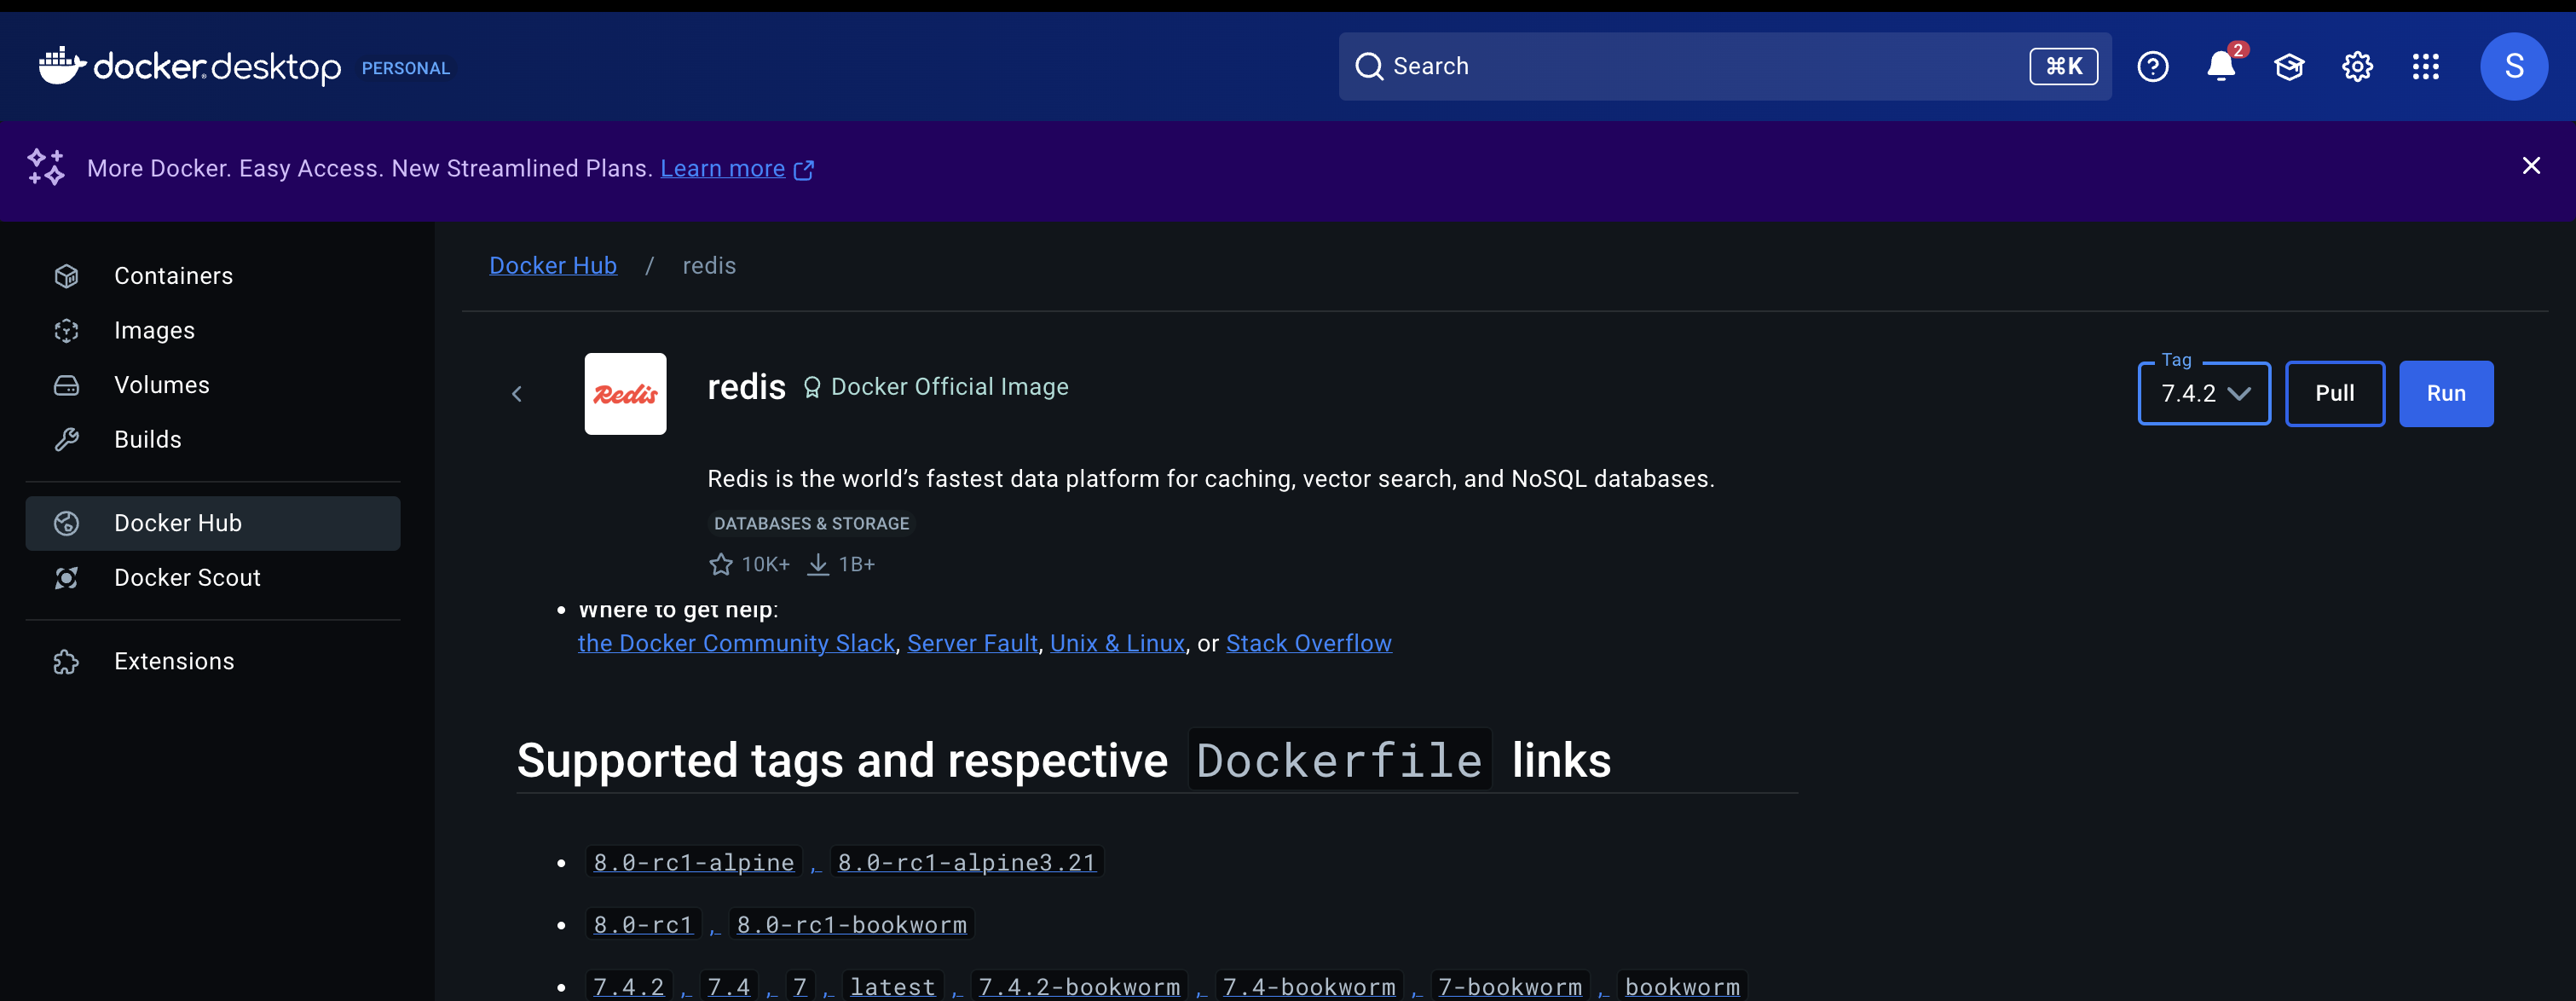
Desktop 에서 Docker Hub 항목으로 들어간 뒤 redis 버전을 선택하고 Pull 받는다.

Redis Image가 잘 받아진 것을 확인할 수 있다.
services:
  postgres:
    image: postgres:15
    restart: always
    volumes:
      - ./postgres-data:/var/lib/postgresql/data
    ports:
      - "5432:5432"
    environment:
      POSTGRES_USER: postgres
      POSTGRES_PASSWORD: postgres
      POSTGRES_DB: postgres

  redis:
    image: redis:7.4.2
    restart: always
    ports:
      - "6379:6379"
docker-compose.yaml 에 위와 같이 redis를 추가하였다.
참고로 받은 redis 버전을 정확하게 입력하여야 한다.

docker-compose up 으로 docker 를 실행하면 이전과 다르게 redis도 실행하는 것을 볼 수 있다.

redis image도 Container 내에서 잘 돌아간다고 활성화 표시가 뜬다.
* 도커에 Redis 를 구성하면...
결론부터 말하면 Redis 서버가 새로 할당되어 캐싱하는 것들은 Redis 서버에 할당된다.
만약 도커에 Redis를 구성하지 않는다면, 캐싱하는(set) 데이터들은 현재 동작하고 있는 서버에서 실행될 것이다.
즉 관리 차원에서나 성능 차원에서나 Redis서버를 도커에 구성하는 것이 여러모로 낫다. (물론 환경이나 상황에 따라 다르다. 모든 것은 트레이드오프)
2. 패키지 설치
npm i cache-manager@4.1.0 cache-manager-redis-store@2.0.0

or

yarn add cache-manager@4.1.0 cache-manager-redis-store@2.0.0
의존성 추가시 cache-manager 라이브러리 버전을 명시하는 이유는 cache-manager 최신 버전인 5.x.x 버전과 cache-manager-redis-store의 버전이 호환되지 않는 이슈로 store.set is not a function 타입 에러가 발생되기 때문이다.
(수정)
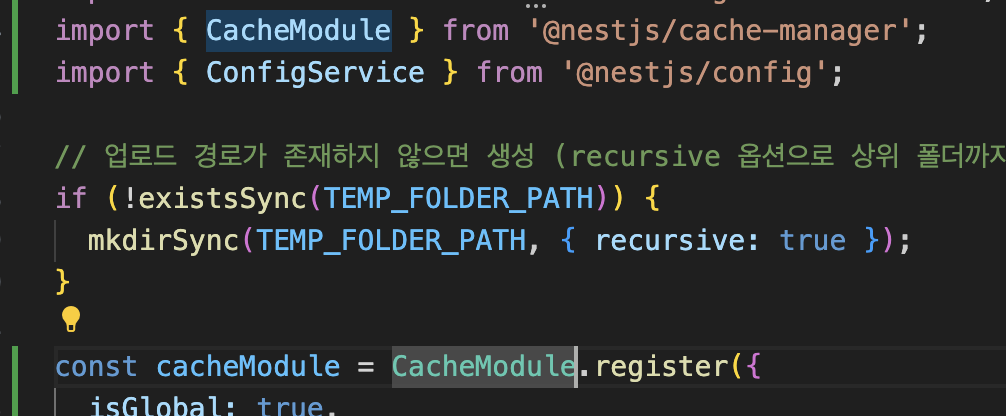
CacheModule이 자꾸 import 되지 않는 문제가 발생했다.
거의 모든 글에서 @nestjs/common에 CacheModule 이 있어서 import 하면 된다고 하였는데 나한텐 자꾸 CacheModule이 없다고 떴다.
* @deprecated `CacheModule` (from the `@nestjs/common` package) is deprecated and will be removed in the next major release. Please, use the `@nestjs/cache-manager` package instead
그래서 node_modules/common/cache.module.d.ts 를 들어가보니 위와 같이 더 이상 @nestjs/common에서 사용하지 않는다고 써있었다.
npm install @nestjs/cache-manager@nestjs/cache-manager를 설치하면 된다고 써있다.
npm error code ERESOLVE
npm error ERESOLVE unable to resolve dependency tree
npm error
npm error While resolving: 2_cf_sns@0.0.1
npm error Found: cache-manager@4.1.0
npm error node_modules/cache-manager
npm error   cache-manager@"4.1.0" from the root project
npm error   peerOptional cache-manager@"*" from @nestjs/microservices@11.0.19
npm error   node_modules/@nestjs/microservices
npm error     peerOptional @nestjs/microservices@"^11.0.0" from @nestjs/core@11.0.19
npm error     node_modules/@nestjs/core
npm error       @nestjs/core@"^11.0.1" from the root project
npm error       4 more (@nestjs/cache-manager, @nestjs/microservices, ...)
npm error
npm error Could not resolve dependency:
npm error peer cache-manager@">=6" from @nestjs/cache-manager@3.0.1
npm error node_modules/@nestjs/cache-manager
npm error   @nestjs/cache-manager@"*" from the root project
npm error
npm error Fix the upstream dependency conflict, or retry
npm error this command with --force or --legacy-peer-deps
npm error to accept an incorrect (and potentially broken) dependency resolution.
npm error
npm error
npm error For a full report see:
npm error /Users/h2k/.npm/_logs/2025-04-16T04_44_11_687Z-eresolve-report.txt
npm error A complete log of this run can be found in: /Users/h2k/.npm/_logs/2025-04-16T04_44_11_687Z-debug-0.log
그럼에도 에러가 떴는데, 이 부분은 cache-manager를 최신 버전을 사용하면 해결된다는 에러이다.
npm install cache-manager@latest이전에 설치했던 cache-manager는 4.1.0인데 이걸 버리고 최신 버전으로 인스톨하자.
이젠 CacheModule을 쓸 수 있게 되었다.
3. RedisService 구현
import { CACHE_MANAGER } from '@nestjs/cache-manager';
import { Inject, Injectable } from '@nestjs/common';
import { Cache } from 'cache-manager';

@Injectable()
export class RedisService {
  constructor(
    @Inject(CACHE_MANAGER)
    private readonly redis: Cache,
  ) {}

  async get(key: string): Promise<any> {
    return await this.redis.get(key);
  }

  async set(key: string, value: any, option?: any) {
    await this.redis.set(key, value, option);
  }

  async clear() {
    await this.redis.clear();
  }

  async del(key: string) {
    await this.redis.del(key);
  }
}
NestJS 공식문서 에는
await this.cacheManager.set('key', 'value', 1000);이러한 방식을 쓰라고 하였지만, 매번 CACHE_MANAGER를 Inject 하기 귀찮으므로 RedisService라는 이름으로 common/redis/redis.service.ts 에 만들었다.
4. CommonModule에 CacheModule과 RedisService 등록하기
import { BadRequestException, Module } from '@nestjs/common';
import { CommonService } from './common.service';
import { CommonController } from './common.controller';
import { MulterModule } from '@nestjs/platform-express';
import { extname } from 'path';
import * as multer from 'multer';
import {v4 as uuid} from 'uuid';
import { existsSync, mkdirSync } from 'fs';
import { TEMP_FOLDER_PATH } from './const/path.const';
import { AuthModule } from 'src/auth/auth.module';
import { UsersModule } from 'src/users/users.module';
import { RedisService } from './redis/redis.service';
import * as redisStore from 'cache-manager-redis-store';
import { CacheModule } from '@nestjs/cache-manager';
import { ConfigService } from '@nestjs/config';

// 업로드 경로가 존재하지 않으면 생성 (recursive 옵션으로 상위 폴더까지 생성)
if (!existsSync(TEMP_FOLDER_PATH)) {
  mkdirSync(TEMP_FOLDER_PATH, { recursive: true });
}

const cacheModule = CacheModule.register({
  isGlobal: true,
  useFactory: (configService: ConfigService) => ({
    store: redisStore,
    host: configService.get<string>('app.redis.host'),
    port: configService.get<string>('app.redis.port'),
    ttl: 60000, // 캐시 default 유지시간: ms
  }),
});

@Module({
  imports: [
    cacheModule,
    MulterModule.register({
      limits: {
        // 바이트 단위로 입력
        fileSize: 1024 * 1024 * 10,
      },
      fileFilter: (req, file, cb) => {
        /**
         * cb(에러, boolean)
         *
         * 첫 번째 파라미터에는 에러가 있을 경우 에러 정보를 넣어준다.
         * 두 번째 파라미터는 파일을 받을지 말지 boolean을 넣어준다.
         */

        // xxx.jpg -> jpg(확장자)만 가져옴
        const ext = extname(file.originalname);

        if(ext !== '.jpg' && ext !== '.jpeg' && ext !== '.png') {
          return cb(
            new BadRequestException('jpg/jpeg/png 파일만 업로드 가능합니다.'),
            false,
          );
        }

        return cb(null, true);
      },
      storage: multer.diskStorage({
        destination: function(req, res, cb) {
          cb(null, TEMP_FOLDER_PATH);
        },
        filename: function(req, file, cb) {
          cb(null, `${uuid()}${extname(file.originalname)}`)
        }
      }),
    }),
    AuthModule,
    UsersModule,
  ],
  controllers: [CommonController],
  providers: [CommonService, RedisService],
  exports: [CommonService, RedisService],
})
export class CommonModule {}
CacheModule.register로 설정하면 되는데, 중요한 점은 ttl을 전역으로 설정해도 기본값으로 먹히지 않을 수 있다. 반드시 set할 때 ttl을 설정하는 습관을 들여야 한다.
그리고 구현한 RedisService를 providers와 exports로 설정하고 PostsModule(RedisService를 쓸 모듈)에 CommonModule을 import 하면 된다.
Redis 캐시 관련 환경 설정하려면 CacheModule을 register해서 import해야한다. CacheModule의 경우, @nestjs/common에 기본적으로 포함되어있다. ttl 옵션의 경우 4.x.x 버전은 초(s) 단위로 입력해야하고 5 버전이상은 밀리초(ms) 단위로 추가하면 된다.
5. 캐싱 사용하기 (Followee의 피드들 불러오기에 적용하기)
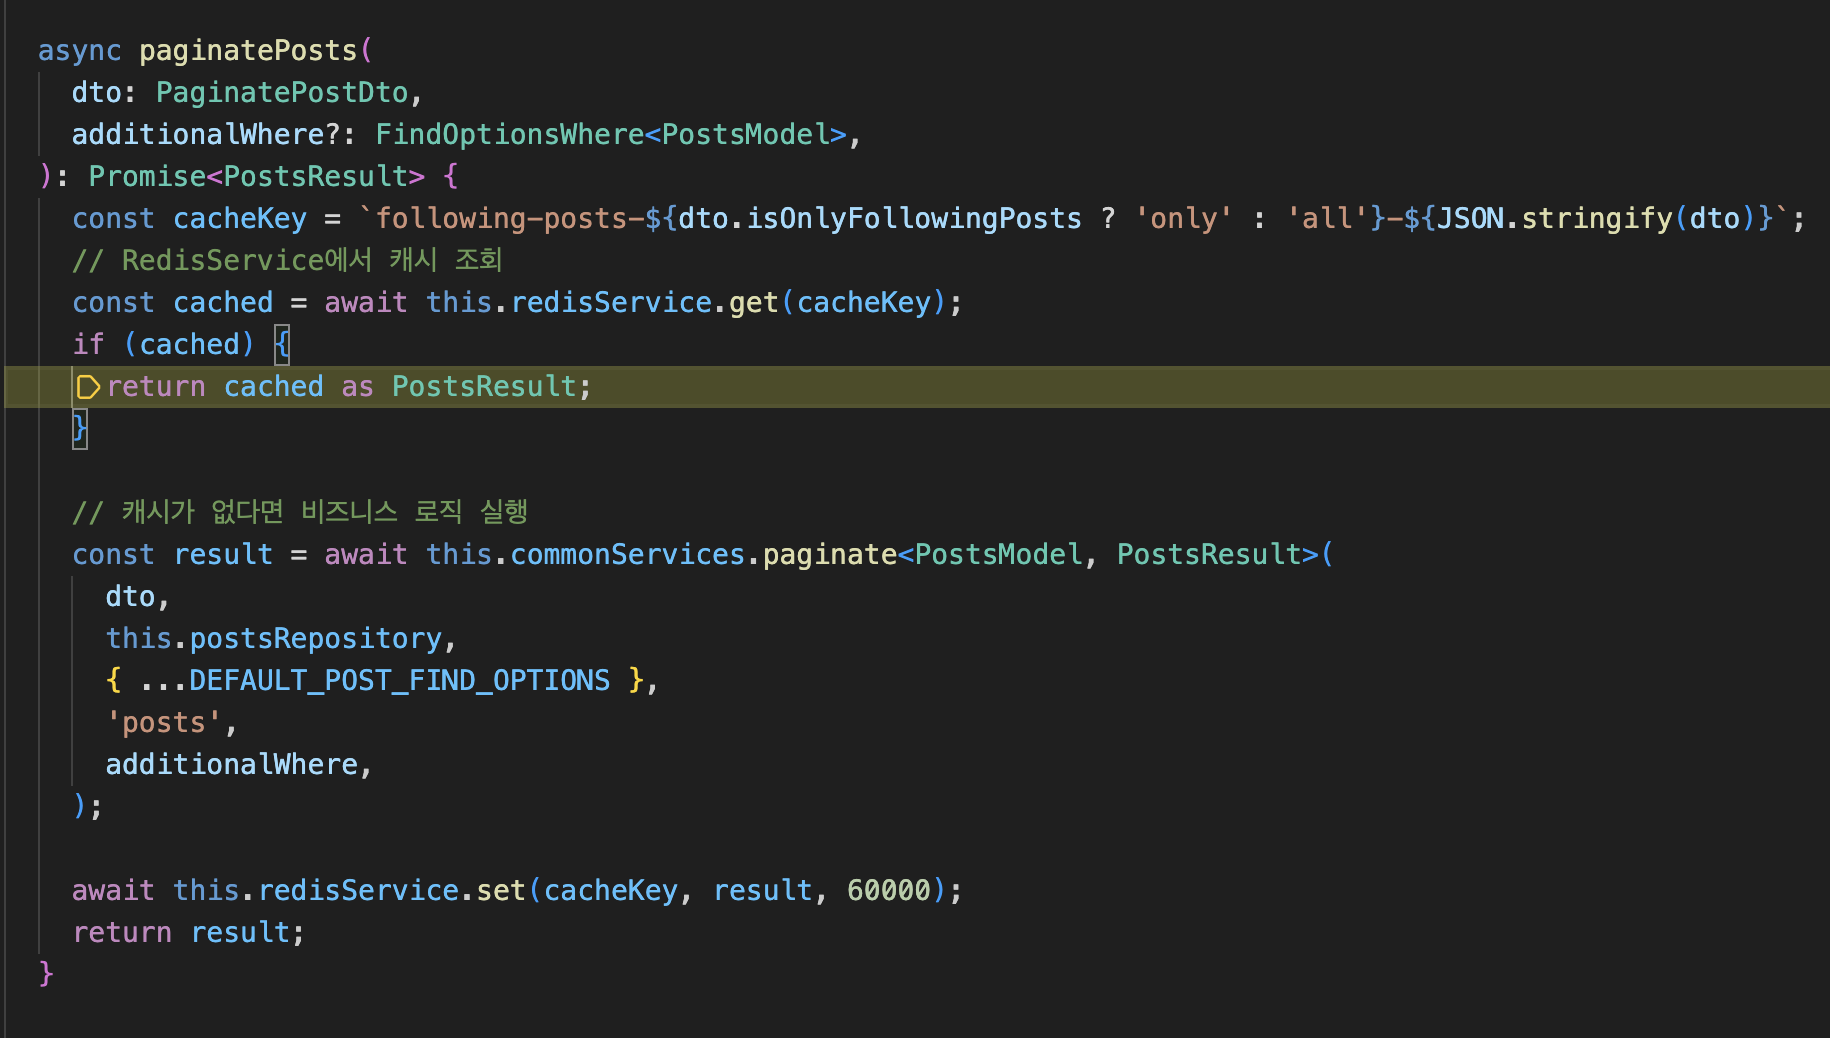
async paginatePosts(
    dto: PaginatePostDto,
    additionalWhere?: FindOptionsWhere<PostsModel>,
  ): Promise<PostsResult> {
    const cacheKey = `following-posts-${dto.isOnlyFollowingPosts ? 'only' : 'all'}-${JSON.stringify(dto)}`;
    // RedisService에서 캐시 조회
    const cached = await this.redisService.get(cacheKey);
    if (cached) {
      return cached as PostsResult;
    }

    // 캐시가 없다면 비즈니스 로직 실행
    const result = await this.commonServices.paginate<PostsModel, PostsResult>(
      dto,
      this.postsRepository,
      { ...DEFAULT_POST_FIND_OPTIONS },
      'posts',
      additionalWhere,
    );

    await this.redisService.set(cacheKey, result, 60000);
    return result;
  }
60초내에는 캐싱되어 기존 result 를 가져온다.
cached는 any 타입이기 때문에 result 타입과 동일한 타입을 따로 만들어 캐스팅하여야 한다.
처음 불러온 뒤 캐싱되었다면 이후 60초내에는 캐싱된 것을 잘 불러온다.

결과값도 기존 캐싱되어있는 값과 동일하다.
6. CacheManager -> Kevy 로 패키지 변경 (최종)
NestJS 공식 문서에서는 CacheManager를 사용하는 것이 되어있지만 Redis와 연동되는 CacheManager는 자세히 나와있지 않았다.
그래서 찾아보니 cache-manager-redis-store 를 2.0.0 으로 설치하라는 것을 알게 되어 설치했으나, CacheManager와 호환이 되지 않고 에러를 계속 발생시키거나,
심지어 저장을 하더라도 Redis에 저장이 되지 않고 자꾸 'in-memory' 에만 저장되는 기이한(?) 현상이 발생하였다.
foo는 직접 ioredis 를 때려박아 테스트한 경우였고, CacheManager와 Redis를 연동해서 사용하는건 Redis에 저장이 되질 않았다.
https://npm-compare.com/@keyv/redis,cache-manager-redis-store,ioredis,keyv,redis,redis-om
keyv vs ioredis vs redis vs @keyv/redis vs cache-manager-redis-store vs redis-om | Redis Client Libraries for Node.js Comparison
keyv vs ioredis vs redis vs @keyv/redis vs cache-manager-redis-store vs redis-om Redis Client Libraries for Node.js Comparison These libraries provide various interfaces and functionalities for interacting with Redis, a powerful in-memory data structure st
npm-compare.com
엄청난 삽질 끝에 결국 사람들이 많이 쓰는 keyv와 keyv-redis 패키지를 사용하는 방향으로 변경하였다.
기존 cache-manager-redis-store 는 무려 3년전에 게시한 이후로 업데이트가 없다. (https://www.npmjs.com/package/cache-manager-redis-store)
반면 keyv-redis 는 아주 업데이트가 활발하므로 지원이 잘된다. (https://www.npmjs.com/package/@keyv/redis)
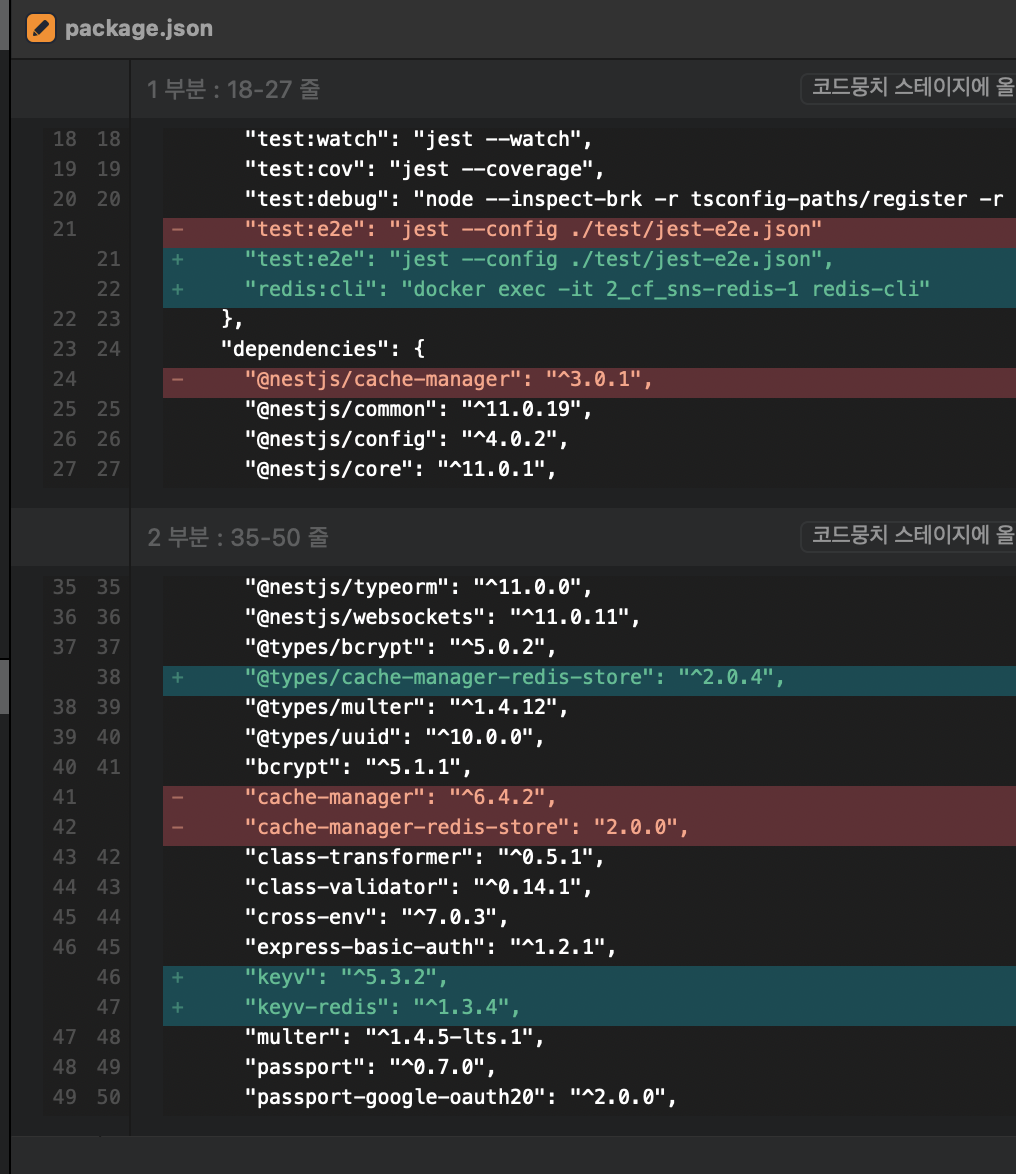
6.1. 패키지 인스톨
npm install keyv keyv-redis6.2. RedisModule 과 RedisService, Constants 추가

6.3. RedisModule 구현
// src/redis/redis.module.ts
import { Module, Global } from '@nestjs/common';
import { ConfigModule, ConfigService } from '@nestjs/config';
import Keyv from 'keyv';
import KeyvRedis from 'keyv-redis';
import { RedisService } from './redis.service';
import { KEYV_TOKEN } from './redis.constants';

@Global()
@Module({
  imports: [ConfigModule],
  providers: [
    {
      provide: KEYV_TOKEN,
      useFactory: (cs: ConfigService) => {
        const host = cs.get<string>('app.redis.host');
        const port = cs.get<number>('app.redis.port');
        return new Keyv({
          store: new KeyvRedis({ host, port }),
          ttl: 60_000,
        });
      },
      inject: [ConfigService],
    },
    RedisService,
  ],
  exports: [RedisService, KEYV_TOKEN],
})
export class RedisModule {}
참고로 nest cli 명령어로 Module을 생성하면 AppModule에 자동으로 import 되며 @Global() 데코레이터를 붙여줬으므로 AppModule에 import만 되어있으면 추가적으로 다른 모듈들에 굳이 RedisModule을 import를 할 필요가 없이 사용이 가능하다.
6.4. RedisService 구현
import { Injectable, Inject } from '@nestjs/common';
import Keyv from 'keyv';
import { KEYV_TOKEN } from './redis.constants';

@Injectable()
export class RedisService {
  constructor(
    @Inject(KEYV_TOKEN)
    private readonly keyv: Keyv,
  ) { }

  async get<T = any>(key: string): Promise<T | undefined> {
    return this.keyv.get(key);
  }

  async set<T = any>(key: string, value: T, ttlMs?: number): Promise<void> {
    await this.keyv.set(key, value, ttlMs);
  }

  async del(key: string): Promise<void> {
    await this.keyv.delete(key);
  }

  async clear(): Promise<void> {
    await this.keyv.clear();
  }
}
이제 다른 Service에서 RedisService를 불러와 사용만 하면 된다!
6.5. 동적 키를 저장하는 REDIS_KEYS_MAPPER 구현
export const REDIS_KEYS_MAPPER = {
followingPosts: (userId: number) => `following-posts/${userId}`,
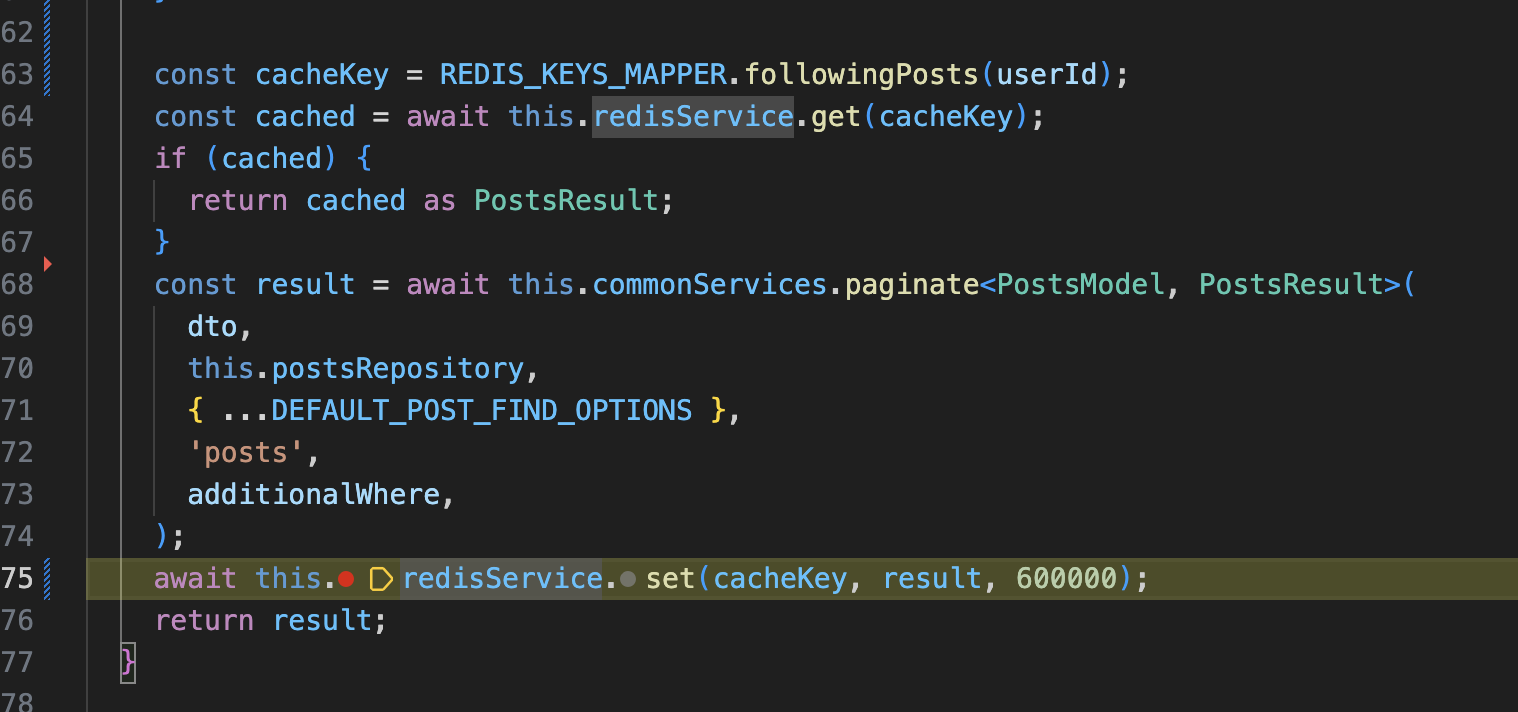
}6.6. 테스트
async paginatePosts(
    dto: PaginatePostDto,
    additionalWhere?: FindOptionsWhere<PostsModel>,
    userId?: number
  ): Promise<PostsResult> {
    if (!dto.isOnlyFollowingPosts || userId == null) {
      return this.commonServices.paginate<PostsModel, PostsResult>(
        dto,
        this.postsRepository,
        { ...DEFAULT_POST_FIND_OPTIONS },
        'posts',
        additionalWhere,
      );
    }

    const cacheKey = REDIS_KEYS_MAPPER.followingPosts(userId);
    const cached = await this.redisService.get(cacheKey);
    if (cached) {
      return cached as PostsResult;
    }
    const result = await this.commonServices.paginate<PostsModel, PostsResult>(
      dto,
      this.postsRepository,
      { ...DEFAULT_POST_FIND_OPTIONS },
      'posts',
      additionalWhere,
    );
    await this.redisService.set(cacheKey, result, 600000);
    return result;
  }
posts 에서 게시글들을 캐싱하여 불러오는 코드를 구현했다.
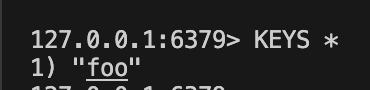
"redis:cli": "docker exec -it 2_cf_sns-redis-1 redis-cli"package.json의 scripts 안에 위의 명령어를 넣고,
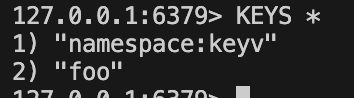
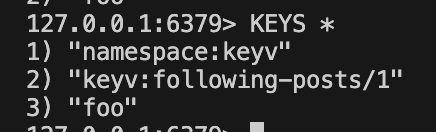
npm run redis:cli를 실행한 뒤, KEYS * 명령어로 Redis 서버에 저장된 키들을 불러올 수 있다.

기존 foo 외에도 잘 저장되었다.
7. 캐싱 리팩토링 (Followee가 새 피드 작성 시 캐시삭제, 동적캐싱 구현)
다만 여기서 문제 하나가 발생된다.
만약 Followee가 신규 피드를 작성하면 어떻게 될까?
현재 코드에선 아마 60초내라면 기존 캐싱된 것을 불러오므로 신규 피드는 포함하지 않는다는 문제점이 있다.
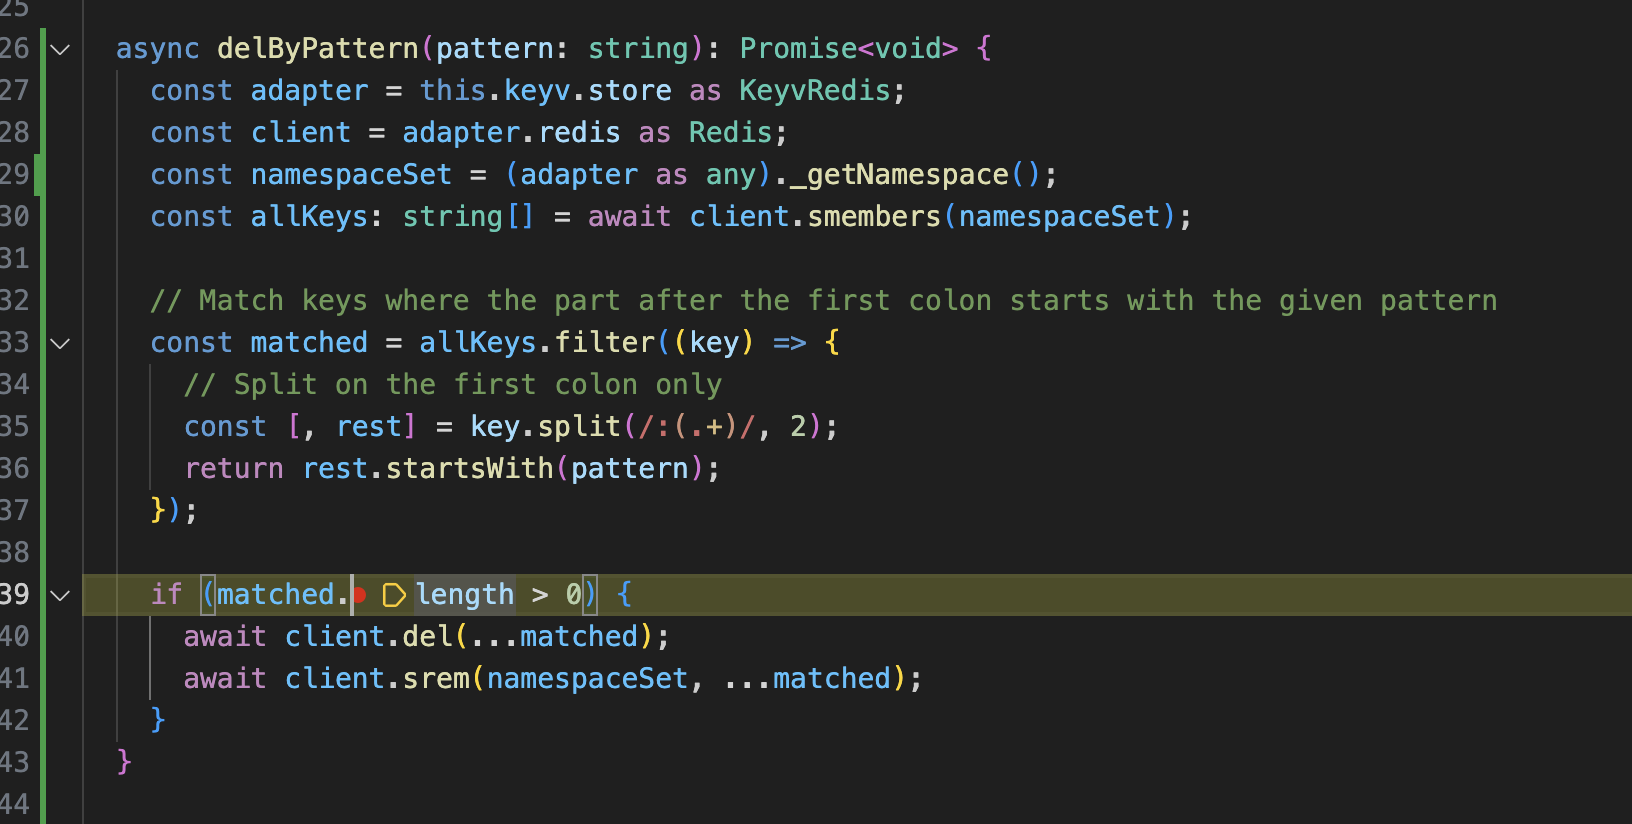
7.1. RedisService에 delByPattern 메서드 추가
async delByPattern(pattern: string): Promise<void> {
    const adapter = this.keyv.store as KeyvRedis;
    const client = adapter.redis as Redis;
    const namespaceSet = (adapter as any)._getNamespace();
    const allKeys: string[] = await client.smembers(namespaceSet);

    // Match keys where the part after the first colon starts with the given pattern
    const matched = allKeys.filter((key) => {
      // Split on the first colon only
      const [, rest] = key.split(/:(.+)/, 2);
      return rest.startsWith(pattern);
    });

    if (matched.length > 0) {
      await client.del(...matched);
      await client.srem(namespaceSet, ...matched);
    }
  }
Redis 서버는 데이터베이스가 유저별로 존재하지 않고, 오직 Redis 서버 한곳에만 저장한다.
그러므로 유저1, 유저2 가 공통된 Key 값의 Dictionary에 접근이 가능하다는 문제점이 있다.
그러므로 paginatePosts()에서 key값을 userId 별로 저장토록 하였다.
그렇다면 Followee가 신규피드를 작성하면 Followee를 구독하는 모든 Follower들이 가지고 있는 Dictionary를 지워야 한다.
delByPattern 은 이러한 모든 패턴의 key값들을 찾아 Dictionary를 지우는 기능이다.
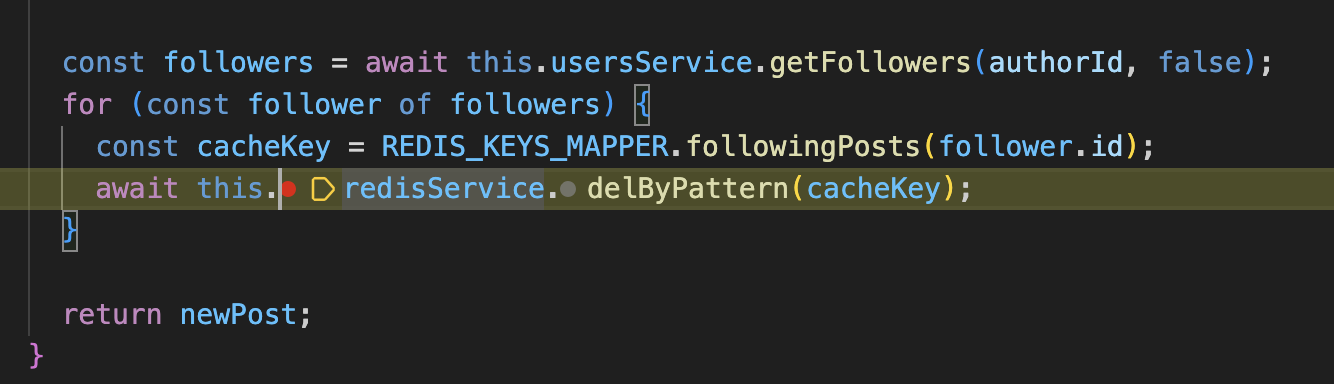
7.2. createPost 수정
async createPost(authorId: number, postDTO: CreatePostDto, qr?: QueryRunner) {
    // 1) create -> 저장할 객체를 생성한다.
    // 2) save -> 객체를 저장한다 (create 메서드로 생성한 객체로)
    const repository = this.getRepository(qr);

    const post = repository.create({
      author: {
        id: authorId,
      },
      ...postDTO,
      images: [],
      likeCount: 0,
      commentCount: 0,
    });

    const newPost = await repository.save(post);

    const followers = await this.usersService.getFollowers(authorId, false);
    for (const follower of followers) {
      const cacheKey = REDIS_KEYS_MAPPER.followingPosts(follower.id);
      await this.redisService.delByPattern(cacheKey);
    }

    return newPost;
  }
신규 피드를 작성하는 createPost 에서 모든 follwer들을 불러온 뒤 delByPattern에 넣으면 모든 key값들을 캐싱을 지워준다.
7.3. 최종 테스트
우선 userId가 1인 유저(유저1)가 userId가 2인 유저(유저2)를 Following 하고 있는 상태라고 세팅을 마치고 테스트를 진행해보자.
유저1이 유저2를 팔로우 하고 있으므로, 유저2의 피드를 읽어올 때 캐싱되며, 위와 같이 following-posts/{userId} 형태로 저장된다.

이제 유저2로 로그인 후에 신규 피드를 작성하면,
유저2 입장에서는 Follower가 유저1이 있으므로 delByPattern 메서드로 진입한다.

matched를 조사식으로 보면 정상적인 key값이 매칭되어 해당 Dictionary를 삭제한다.
터미널로 Redis를 확인해봐도 캐싱된 것이 사라졌다.
다시 유저1로 로그인하여 피드를 읽어오면 기존 캐싱이 삭제되었기 때문에 다시 캐싱을 하는 것을 볼 수 있다.
다시 정상적으로 캐싱이 된다.
'NestJS' 카테고리의 다른 글
| [NestJS] 데이터 시딩 - 50만건 더미 데이터 추가하기 (0) | 2025.05.08 |
|---|---|
| [NestJS] Redis 적용하기 - Rate Limiting (0) | 2025.04.21 |
| [NestJS] Kakao OAuth2.0 Passport (0) | 2025.04.14 |
| [NestJS] Google Oauth2.0 Passport (0) | 2025.04.12 |
| [NestJS] Swagger 사용법 (1) | 2025.04.07 |


