1. Passport 주요 흐름
1.1. 클라이언트의 구글 로그인 요청
클라이언트는 Google 로그인 엔드포인트(예: /auth/google/login)에 접근한다.
1.2. 가드 적용
GoogleAuthGuard 가드 실행
1.3. Passport의 AuthGuard 호출
GoogleAuthGuard는 내부적으로 Passport의 authenticate('google')를 호출한다. 이 호출 시 Passport는 “google” 전략이 등록되어 있어야 하며, 그 전략의 설정 값을 기반으로 구글로 리다이렉션하기 위한 인증 요청을 준비한다 .
1.4. 리다이렉션
브라우저 상에서 사용자가 로그인 후 구글 계정으로 인증 완료하면, 구글은 사용자를 미리 지정한 callback URL(예:/auth/google/callback)로 리다이렉션한다.
1.5. Guard 재실행 (Callback 엔드포인트)
callback 엔드포인트(예: /auth/google/callback)에도 GoogleAuthGuard가 적용된다. 이 시점에 Passport의 내부 로직이 동작해, 구글에서 전달된 인증 코드와 토큰 정보를 해석한다.
1.6. Callback 요청 도착
구글 인증 후, 사용자의 브라우저가 callback URL로 리다이렉션하면서, 인증 코드 및 기타 토큰 정보가 함께 전달된다.
1.7. GoogleStrategy의 validate 메서드 호출
Passport는 GoogleStrategy 클래스의 validate 메서드를 호출한다 .
이 메서드에는 구글에서 전달된 accessToken, refreshToken, 그리고 사용자 프로필(Profile)이 전달된다.
validate 메서드에서는 사용자 프로필 정보를 이용해 기존 사용자가 존재하는지 조회하거나, 신규 사용자를 생성하는 로직이 실행된다.
완료 후, 사용자가 done(null, user)를 호출하여 Passport에 반환되고, 해당 정보는 req.user에 저장된다 .
1.8. 컨트롤러 핸들러 실행
Passport가 성공적으로 인증을 완료하면, callback 엔드포인트에 매핑된 컨트롤러 핸들러(예: googleAuthRedirect)가 실행된다. 이때, NestJS의 커스텀 데코레이터(@User())나 @Req()를 통해 req.user에 있는 사용자 정보를 컨트롤러에 주입할 수 있다.
1.9. 토큰 발급 및 응답
컨트롤러는 req.user 정보를 받아 내부의 AuthService의 loginUser()와 같은 메서드를 호출한다. 이 메서드는 내부적으로 JWT 등을 발급하여 최종적으로 클라이언트에게 액세스 토큰(및 필요 시 리프레시 토큰)을 반환한다.
2. Google Cloud 에서 Oauth2.0 설정
2.1. Google Cloud 에 접속
https://console.cloud.google.com/
Google 클라우드 플랫폼
로그인 Google 클라우드 플랫폼으로 이동
accounts.google.com
2.2. 프로젝트 생성

프로젝트가 없다면 생성 후 해당 프로젝트를 선택한다.
2.3. API 및 서비스로 진입

2.4. Oauth 생성


각종 정보를 입력하여 만든다.

그 후에 OAuth 클라이언트 만들기를 클릭한다.

여기서 중요한 부분은 승인된 리디렉션 URI 를 입력해야한다. 이 부분이 구글 로그인 및 회원가입 후에 서버에서 구현한 Callback 엔드포인트로 호출하는 부분이다.

이렇게 생성된다.
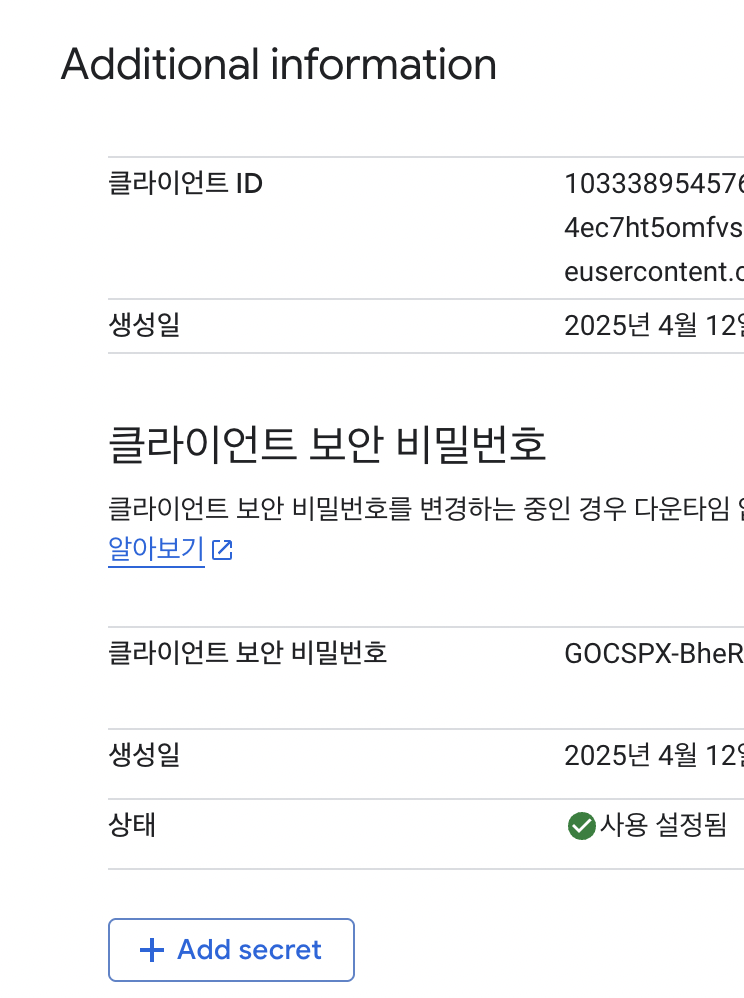
해당 OAuth 를 눌러보면 클라이언트 ID, 클라이언트 보안 비밀번호 등이 있다.
3. 패키지 인스톨
npm i passport passport-google-oauth20기본적인 passport 와 Google OAuth 사용을 위한 passport-google-oauth20 을 설치해야 한다.
npm i -D @type/passport-google-oauth20기존 passport-google-oauth20 는 TS 호환이 되지 않기 때문에 추가적으로 @type/passport-google-oauth20 도 설치한다.
4. .env 등록
import { registerAs } from '@nestjs/config';

export default registerAs('google', () => ({
  clientId: process.env.GOOGLE_CLIENT_ID,
  clientSecret: process.env.GOOGLE_CLIENT_SECRET,
  callbackUrl: process.env.GOOGLE_CALLBACK_URL,
}));
5. Config를 사용할 수 있도록 모듈 등록
import { Module } from '@nestjs/common';
import { AuthService } from './auth.service';
import { AuthController } from './auth.controller';
import { JwtModule } from '@nestjs/jwt';
import { UsersModule } from 'src/users/users.module';
import { GoogleStrategy } from './strategies/google.strategy';
import { ConfigModule } from '@nestjs/config';
import googleConfig from 'src/configs/google.config';

@Module({
  imports: [
    ConfigModule.forFeature(googleConfig),
    JwtModule.register({}),
    UsersModule,
  ],
  exports: [AuthService],
  controllers: [AuthController],
  providers: [AuthService, GoogleStrategy],
})
export class AuthModule {}
app.module.ts 의 Module에 googleConfig를 사용하기 위해 등록한다.
6. UsersModel 에 google 컬럼 추가
@Column({
        unique: true,
        nullable: true,
    })
    @IsString()
    google: string;
UsersModel 에 Google ID를 받기 위해 컬럼을 추가한다.
참고로 nullable을 true로 하여야 DB에서 에러가 발생하지 않는다.
7. Google로 로그인한 사용자 찾거나 생성하는 로직 구현
async findOrCreateByGoogle({
        email,
        displayName,
        googleId,
    }: {
        email: string;
        displayName: string;
        googleId: string;
    }): Promise<UsersModel> {
        // 먼저, google 필드가 googleId와 매칭되는 사용자가 있는지 확인
        let user = await this.usersRepository.findOne({ where: { google: googleId } });

        // 만약 사용자가 없다면, email로도 찾을 수 있다면 두 가지를 병합할 수도 있음
        if (!user && email) {
            user = await this.usersRepository.findOne({ where: { email } });
        }

        // 사용자가 존재하지 않는다면 신규 생성
        if (!user) {
            user = await this.createUser({
                email,
                nickname: displayName,
                password: '',       // 구글 로그인은 패스워드가 필요 없으므로 빈 문자열 지정
                google: googleId,   // 구글 고유 식별자 저장
            });
        } else if (!user.google) {
            // 기존에 email로 가입된 사용자의 경우, 구글 연동이 안 되어 있다면 google 필드 업데이트
            user.google = googleId;
            await this.usersRepository.save(user);
        }

        return user;
    }
users.service.ts 에서 구글로 로그인한 사용자가 있는지 찾는 findOrCreateByGoogle 서비스를 구현한다.
async createUser(user: Partial<UsersModel>) {
        // 1) 닉네임 중복이 없는지 확인
        // exist() -> 만약 조건에 해당되는 값이 있으면 true 반환
        const nicknameExists = await this.usersRepository.exists({
            where: {
                nickname: user.nickname,
            }
        });

        if(nicknameExists) {
            throw new BadRequestException('이미 존재하는 nickname 입니다!');
        }

        const emailExists = await this.usersRepository.exists({
            where: {
                email: user.email,
            }
        });

        if(emailExists) {
            throw new BadRequestException('이미 존재하는 email 입니다!');
        }

        const userObj = this.usersRepository.create({
            nickname: user.nickname,
            email: user.email,
            password: user.password,
            google: user.google,
        });

        const newUser = await this.usersRepository.save(userObj);

        return newUser;
    }
그리고 createUser에서 create할 때 google 을 추가해주어야 Google ID가 정상적으로 추가된다.
8. GoogleStrategy 구현
import { Inject, Injectable } from '@nestjs/common'
import { ConfigType } from '@nestjs/config'
import { PassportStrategy } from '@nestjs/passport'
import { Profile, Strategy, VerifyCallback } from 'passport-google-oauth20'
import googleConfig from 'src/configs/google.config'
import { UsersService } from 'src/users/users.service'

@Injectable()
export class GoogleStrategy extends PassportStrategy(Strategy, 'google') {
  constructor(
    @Inject(googleConfig.KEY)
    private readonly config: ConfigType<typeof googleConfig>,
    private usersService: UsersService,
  ) {
    super({
      clientID: config.clientId as string,
      clientSecret: config.clientSecret as string,
      callbackURL: config.callbackUrl as string,
      scope: ['email', 'profile'],
    })
  }

  // refreshToken를 얻기 위한 필수 코드
  authorizationParams(): {[key: string]: string; } {
    return ({
      access_type: 'offline',
      prompt: 'select_account',
    });
  }

  async validate(
    accessToken: string,
    refreshToken: string,
    profile: Profile,
    done: VerifyCallback,
  ) {
    const { id, displayName, emails } = profile;
    const googleId = id;
    const email = emails && emails.length > 0 ? emails[0].value : '';

    // 사용자를 조회하거나 생성하는 로직을 실행합니다.
    const user = await this.usersService.findOrCreateByGoogle({
        email,
        displayName,
        googleId,
    });

    done(null, user);
  }
}
이제 PassPortStrategy를 활용한 GoogleStrategy 를 구현한다. authorizationParams()는 선택이고, validate 메서드는 필수이다.
9. GoogleAuthGuard 구현
import { Injectable } from "@nestjs/common";
import { AuthGuard } from "@nestjs/passport";

@Injectable()
export class GoogleAuthGuard extends AuthGuard("google") {
  async canActivate(context: any): Promise<boolean> {
    const result = (await super.canActivate(context)) as boolean;
    return result;
  }
}
PassportStrategy가 실행되어 validate가 진행되려면 AuthGuard가 실행되어야 한다. GoogleAuthGuard를 위와 같이 만든 .
10. 컨트롤러 등록
@Get("login/google")
@UseGuards(GoogleAuthGuard)
@IsPublic(IsPublicEnum.IS_PUBLIC)
googleAuth() {
console.log('GET google/login')
}

@Get("google/callback")
@UseGuards(GoogleAuthGuard)
@IsPublic(IsPublicEnum.IS_PUBLIC)
googleAuthRedirect(@User() user: UsersModel) {
return this.authService.loginUser(user);
}
이제 위와 같이 구글 로그인과 로그인 후 콜백받는 라우터를 구현한다.
리다이렉션되면 '/auth/google/callback' 엔드포인트가 실행되는데, 이때 기존에 구현해두었던 authService.loginUser를 호출하여 AccessToken과 RefreshToken을 클라이언트에 반환하도록 구현하였다.
11. 실행 결과

브라우저에 구현한 엔드포인트를 입력한다.

정상적으로 Passport가 적용되었다면 위와 같이 구글로그인 화면이 호출된다.

리다이렉션 엔드포인트도 정상적으로 호출된다. (참고로 리다이렉션되면서 자동으로 해당 엔드포인트가 호출된다.)

DB에도 정상적으로 유저가 생성되었다.
12. 참고 사항
구글 로그인 화면 및 리다이렉션의 특성으로 Postman과 Swagger에 적용하기가 어렵다.
'NestJS' 카테고리의 다른 글
| [NestJS] Redis 적용하기 (캐싱) (0) | 2025.04.17 |
|---|---|
| [NestJS] Kakao OAuth2.0 Passport (0) | 2025.04.14 |
| [NestJS] Swagger 사용법 (1) | 2025.04.07 |
| [NestJS] process.env 사용 및 분기처리 (0) | 2025.04.05 |
| [NestJS] Authorization Guard (0) | 2025.03.14 |


