// 3) POST /posts
  //  post를 생성한다.
  //
  // DTO - Data Transfer Object (데이터 전송 객체)
  @Post()
  @UseGuards(AccessTokenGuard)
  postPosts(
    @User('id') userId: number,
    @Body('title') title: string,
    @Body('content') content: string,
  ) {
    return this.postsService.createPost(userId, title, content);
  }
위의 코드에서 조금 고치고 싶은 부분이 있다면 바로 이 부분일 것이다.
@Body('title') title: string,
@Body('content') content: string,
@Body안에 title과 content를 직접 타이핑해야하는 불편함과 오타로 인한 휴먼에러를 발생시킬 수 있다. 이러한 부분들을 유지보수와 재사용성을 고려한 Class Validation과 DTO로 해결이 가능하다.
DTO (Data Transfer Object)란?
DTO는 단순히 데이터의 구조(형태)를 정의하는 클래스이다.
예를 들어, 사용자를 생성할 때 필요한 데이터가 무엇인지 결정하고, 그 데이터의 타입과 필수 여부를 명시하는 역할을 합니다. DTO 자체는 데이터를 담는 그릇일 뿐, 값의 유효성을 검사하지 않는다.
// create-user.dto.ts
export class CreateUserDto {
  // 사용자 이메일: 단순히 문자열을 담기 위한 필드
  email: string;

  // 사용자 비밀번호: 단순히 문자열을 담기 위한 필드
  password: string;
}
Class Validation이란?
Class Validation은 DTO에 적용된 데코레이터를 통해, 실제로 데이터가 유효한지 검증하는 역할을 한다.
클래스 검증을 위해 보통 class-validator와 class-transformer를 함께 사용한다. 이때 DTO에 데코레이터를 붙여서 각 필드의 규칙을 정의한다.
// create-user.dto.ts (검증 데코레이터 추가)
import { IsEmail, IsNotEmpty, MinLength } from 'class-validator';

export class CreateUserDto {
  @IsEmail() // email 필드가 유효한 이메일 형식인지 검사
  email: string;

  @IsNotEmpty()         // 비밀번호가 빈 값이 아님을 검사
  @MinLength(6)         // 비밀번호가 최소 6자 이상인지 검사
  password: string;
}
패키지 설치
yarn add class-validator

// 혹은

npm i class-validator
yarn add class-transformer
// 혹은
npm i class-transformerCreatePostDto 구현하기
import { IsString } from 'class-validator';

export class CreatePostDto {
  @IsString()
  title: string;

  @IsString()
  content: string;
}Dto와 Validation은 위와 같이 구성할 수 있다.
@IsString() 과 같은 검증 역할을 하는 것이 Validation을 의미한다.
@IsString()은 String 타입으로 진행되는 것인지 체크한다.
  // 3) POST /posts
  //  post를 생성한다.
  //
  // DTO - Data Transfer Object (데이터 전송 객체)
  @Post()
  @UseGuards(AccessTokenGuard)
  postPosts(
    @User('id') userId: number,
    @Body() body: CreatePostDto,
    // @Body('title') title: string,
    // @Body('content') content: string,
  ) {
    return this.postsService.createPost(userId, body);
  }
Dto를 만들었으면 위와 같이 적용할 수 있다.
기존 @Body('title') 과 같은 부분을 @Body() body: CreatePostDto 로 수정한다.
import { NestFactory } from '@nestjs/core';
import { AppModule } from './app.module';
import { ValidationPipe } from '@nestjs/common';

async function bootstrap() {
  const app = await NestFactory.create(AppModule);

  app.useGlobalPipes(new ValidationPipe());

  await app.listen(process.env.PORT ?? 3000);
}
bootstrap();
그리고 Validation이 되도록 하려면 main.ts를 위와 같이 변경해야한다.
import { ValidationPipe } from '@nestjs/common';

app.useGlobalPipes(new ValidationPipe());
해당 코드가 추가되어야 검증이 진행된다.
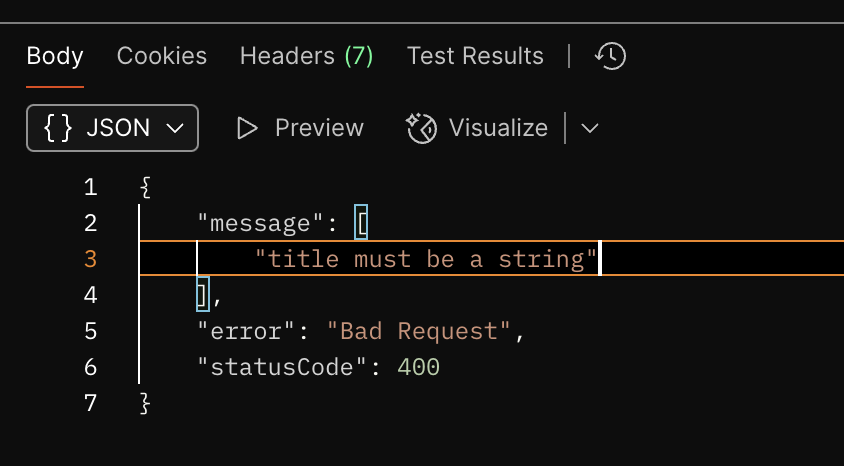
그리고 Postman에서 서버로 Send하면 위와 같이 검증되는 것을 알 수 있다. 위의 상황은 title이 string이 아닐 경우이다.
Validation Message 변경하기
위의 사진에서는 "title must be a string" 이라고 출력되고 있다.
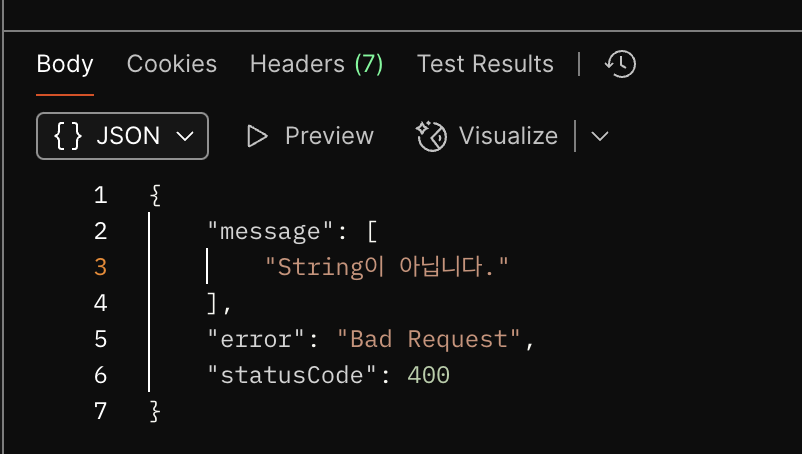
이것또한 사용자에 맞게 변경이 가능하다.
@IsString({
    message: 'String이 아닙니다.',
  })
CreatePostDto 고도화하기
import { BaseModel } from 'src/common/entity/base.entity';
import { stringValidationMessage } from 'src/common/validation-message/string-validation.message';
import { UsersModel } from 'src/users/entities/users.entity';
import { Column, Entity, JoinTable, ManyToOne } from 'typeorm';

@Entity()
export class PostsModel extends BaseModel {
  @ManyToOne(() => UsersModel, (user) => user.posts, {
    eager: true,
    nullable: false,
  })
  @JoinTable()
  author: UsersModel;

  @Column()
  title: string;

  @Column()
  content: string;

  @Column()
  likeCount: number;

  @Column()
  commentCount: number;
}
우리는 포스트(글)을 생성하는 부분을 '검증'하는 CreatePostDto를 만들었다.
그런데 PostsModel을 보면 CreatePostDto가 검증하는 Key가 포함되어있다는 것을 알 수 있다.
import { IsString } from 'class-validator';
import { BaseModel } from 'src/common/entity/base.entity';
import { UsersModel } from 'src/users/entities/users.entity';
import { Column, Entity, JoinTable, ManyToOne } from 'typeorm';

@Entity()
export class PostsModel extends BaseModel {
  @ManyToOne(() => UsersModel, (user) => user.posts, {
    eager: true,
    nullable: false,
  })
  @JoinTable()
  author: UsersModel;

  @Column()
  @IsString()
  title: string;

  @Column()
  @IsString()
  content: string;

  @Column()
  likeCount: number;

  @Column()
  commentCount: number;
}
CreatePostDto에 있던 @IsString()을 PostsModel에 title과 content로 옮겨준다.
import { PickType } from "@nestjs/mapped-types";
import { PostsModel } from "../entities/posts.entity";

export class CreatePostDto extends PickType(PostsModel, ['title', 'content']) {}
CreatePostDto는 위와 같은 코드로 변경하면 된다.
PickType은 PostsModel 클래스의 title과 content를 가져와 CreatePostDto에 구성될 수 있도록 한다.
UpdatePostDto 구현하기 (patchPost 수정)
// 4) Patch /posts:id
  //  id에 해당되는 post를 변경한다.
  @Patch(':id')
  patchPost(
    @Param('id', ParseIntPipe) id: number,
    @Body() body: UpdatePostDto,
    // @Body('title') title?: string,
    // @Body('content') content?: string,
  ) {
    return this.postsService.updatePost(id, body);
  }
마찬가지로 포스트를 수정하는 라우터에 UpdatePostDto를 붙인다.
patchPost의 title과 content는 옵셔널로 구성되어있기 때문에, UpdatePostDto도 그러한 부분을 반영해야한다.
import { PartialType } from "@nestjs/mapped-types";
import { CreatePostDto } from "./create-post.dto";
import { IsOptional, IsString } from "class-validator";

export class UpdatePostDto extends PartialType(CreatePostDto) {
    @IsString()
    @IsOptional()
    title?: string;

    @IsString()
    @IsOptional()
    content?: string;
}
PartialType(CreatePostDto)를 하게 되면 CreatePostDto의 Key를 가져올 수 있으나 오버라이딩할 수 있게 된다.
@IsOptional() Validation을 붙여 옵셔널 할 수 있도록 하게 한다.
Validation Message 고도화하기
@IsString({
    message: 'String이 아닙니다.',
  })
앞서 @IsString에 message를 추가할 수 있다는 것을 알게 되었는데, 여러 Validation에 일일이 message를 기록해주는 것은 여간 고통이 아닐 수 없다.
Length Validation Message 구현
import { ValidationArguments } from "class-validator";

export const lengthValidationMessage = (args: ValidationArguments) => {
    if(args.constraints.length === 2) {
        return `${args.property}은 ${args.constraints[0]}~${args.constraints[1]}글자를 입력해주세요.`;
    } else {
        return `${args.property}는 최소 ${args.constraints[0]}글자를 입력해주세요.`;
    }
}
메서드의 매개변수로 args: ValidationArguments 를 입력하면 Validation의 입력된 값이나 오브젝트 등 다양한 기능들을 수행할 수 있다.
@Length(1, 20, {
        message: lengthValidationMessage,
    })
String 과 Email 검증 작업
import { ValidationArguments } from "class-validator";

export const stringValidationMessage = (args: ValidationArguments) => {
    return `${args.property}에 String을 입력해주세요.`;
}
import { ValidationArguments } from "class-validator";
export const emailValidationMessage = (args: ValidationArguments) => {
return `${args.property}에 정확한 이메일을 입력해주세요.`;
}위와 같이 일반적인 String 검증과 Email 검증도 일반화하여 재사용할 수 있게 된다.
UsersModel 등에 적용하기
import { IsEmail, IsString, Length } from "class-validator";
import { BaseModel } from "src/common/entity/base.entity";
import { emailValidationMessage } from "src/common/validation-message/email-validation.message";
import { lengthValidationMessage } from "src/common/validation-message/length-validation.message";
import { stringValidationMessage } from "src/common/validation-message/string-validation.message";
import { PostsModel } from "src/posts/entities/posts.entity";
import { Column, Entity, OneToMany } from "typeorm";

export enum RoleEnum {
    USER = 'user',
    ADMIN = 'admin',
}

@Entity()
export class UsersModel extends BaseModel {
    @Column({
        length: 20,
        unique: true,
    })
    @IsString({
        message: stringValidationMessage,
    })
    @Length(1, 20, {
        message: lengthValidationMessage,
    })
    nickname: string;

    @Column({
        unique: true,
    })
    @IsString({
        message: stringValidationMessage,
    })
    @IsEmail({}, {
        message: emailValidationMessage,
    })
    email: string;

    @Column()
    @IsString({
        message: stringValidationMessage,
    })
    @Length(3, 8, {
        message: lengthValidationMessage,
    })
    password: string;

    @Column({
        type: 'enum',
        enum: RoleEnum,
        default: RoleEnum.USER,
    })
    role: RoleEnum;

    @OneToMany(() => PostsModel, (post) => post.author)
    posts: PostsModel[]
}
이렇게 만들어진 Validation Message를 message에 적용할 수 있게 된다.
'NestJS' 카테고리의 다른 글
| NetJS - Pagination 기본 (0) | 2025.03.02 |
|---|---|
| NestJS - Class Transformer (0) | 2025.02.28 |
| Postman 심화기능 (0) | 2025.02.27 |
| NestJS - Custom Decorator (0) | 2025.02.27 |
| NestJS - Guard (0) | 2025.02.27 |


