https://stack501.tistory.com/143
[NestJS] SocketIO 일반
https://stack501.tistory.com/71 Socket.io - 정의, 설치, 작동 원리, 특징1. Socket.io 란?Socket.IO는 웹 소켓 연결을 통해 클라이언트와 서버간에 실시간 양방향 통신을 가능하게하는 JavaScript 라이브러리이다.
stack501.tistory.com
일반편에 이어 구현한 SocketIO를 좀 더 고도화하는 과정을 진행해보자.
1. Validation Pipe 적용하기
@UsePipes(
    new ValidationPipe({
      transform: true,
      transformOptions: {
        enableImplicitConversion: true,
      },
      whitelist: true,
      forbidNonWhitelisted: true,
    }),
  )
@WebSocketGateway({
    // ws://localhost:3000/chats
    namespace: 'chats'
})
@UseFilters(new WsErrorFilter())
export class ChatsGateway implements OnGatewayConnection {
UsePipe를 이용해서 웹소켓에도 Validation이 동작하도록 할 수 있다. 이것을 ChatsGateway 클래스에 사용하면 해당 클래스내의 모든 통신에 적용이 된다.
2. Exception Filter 적용하기
import { Catch, ArgumentsHost, HttpException } from '@nestjs/common';
import {  BaseWsExceptionFilter } from '@nestjs/websockets';

@Catch(HttpException)
export class WsErrorFilter extends BaseWsExceptionFilter<HttpException> {
  catch(exception: HttpException, host: ArgumentsHost) {
    const socket = host.switchToWs().getClient();

    socket.emit(
        'exception',
        {
            data: exception.getResponse(),
        }
    )
  }
}
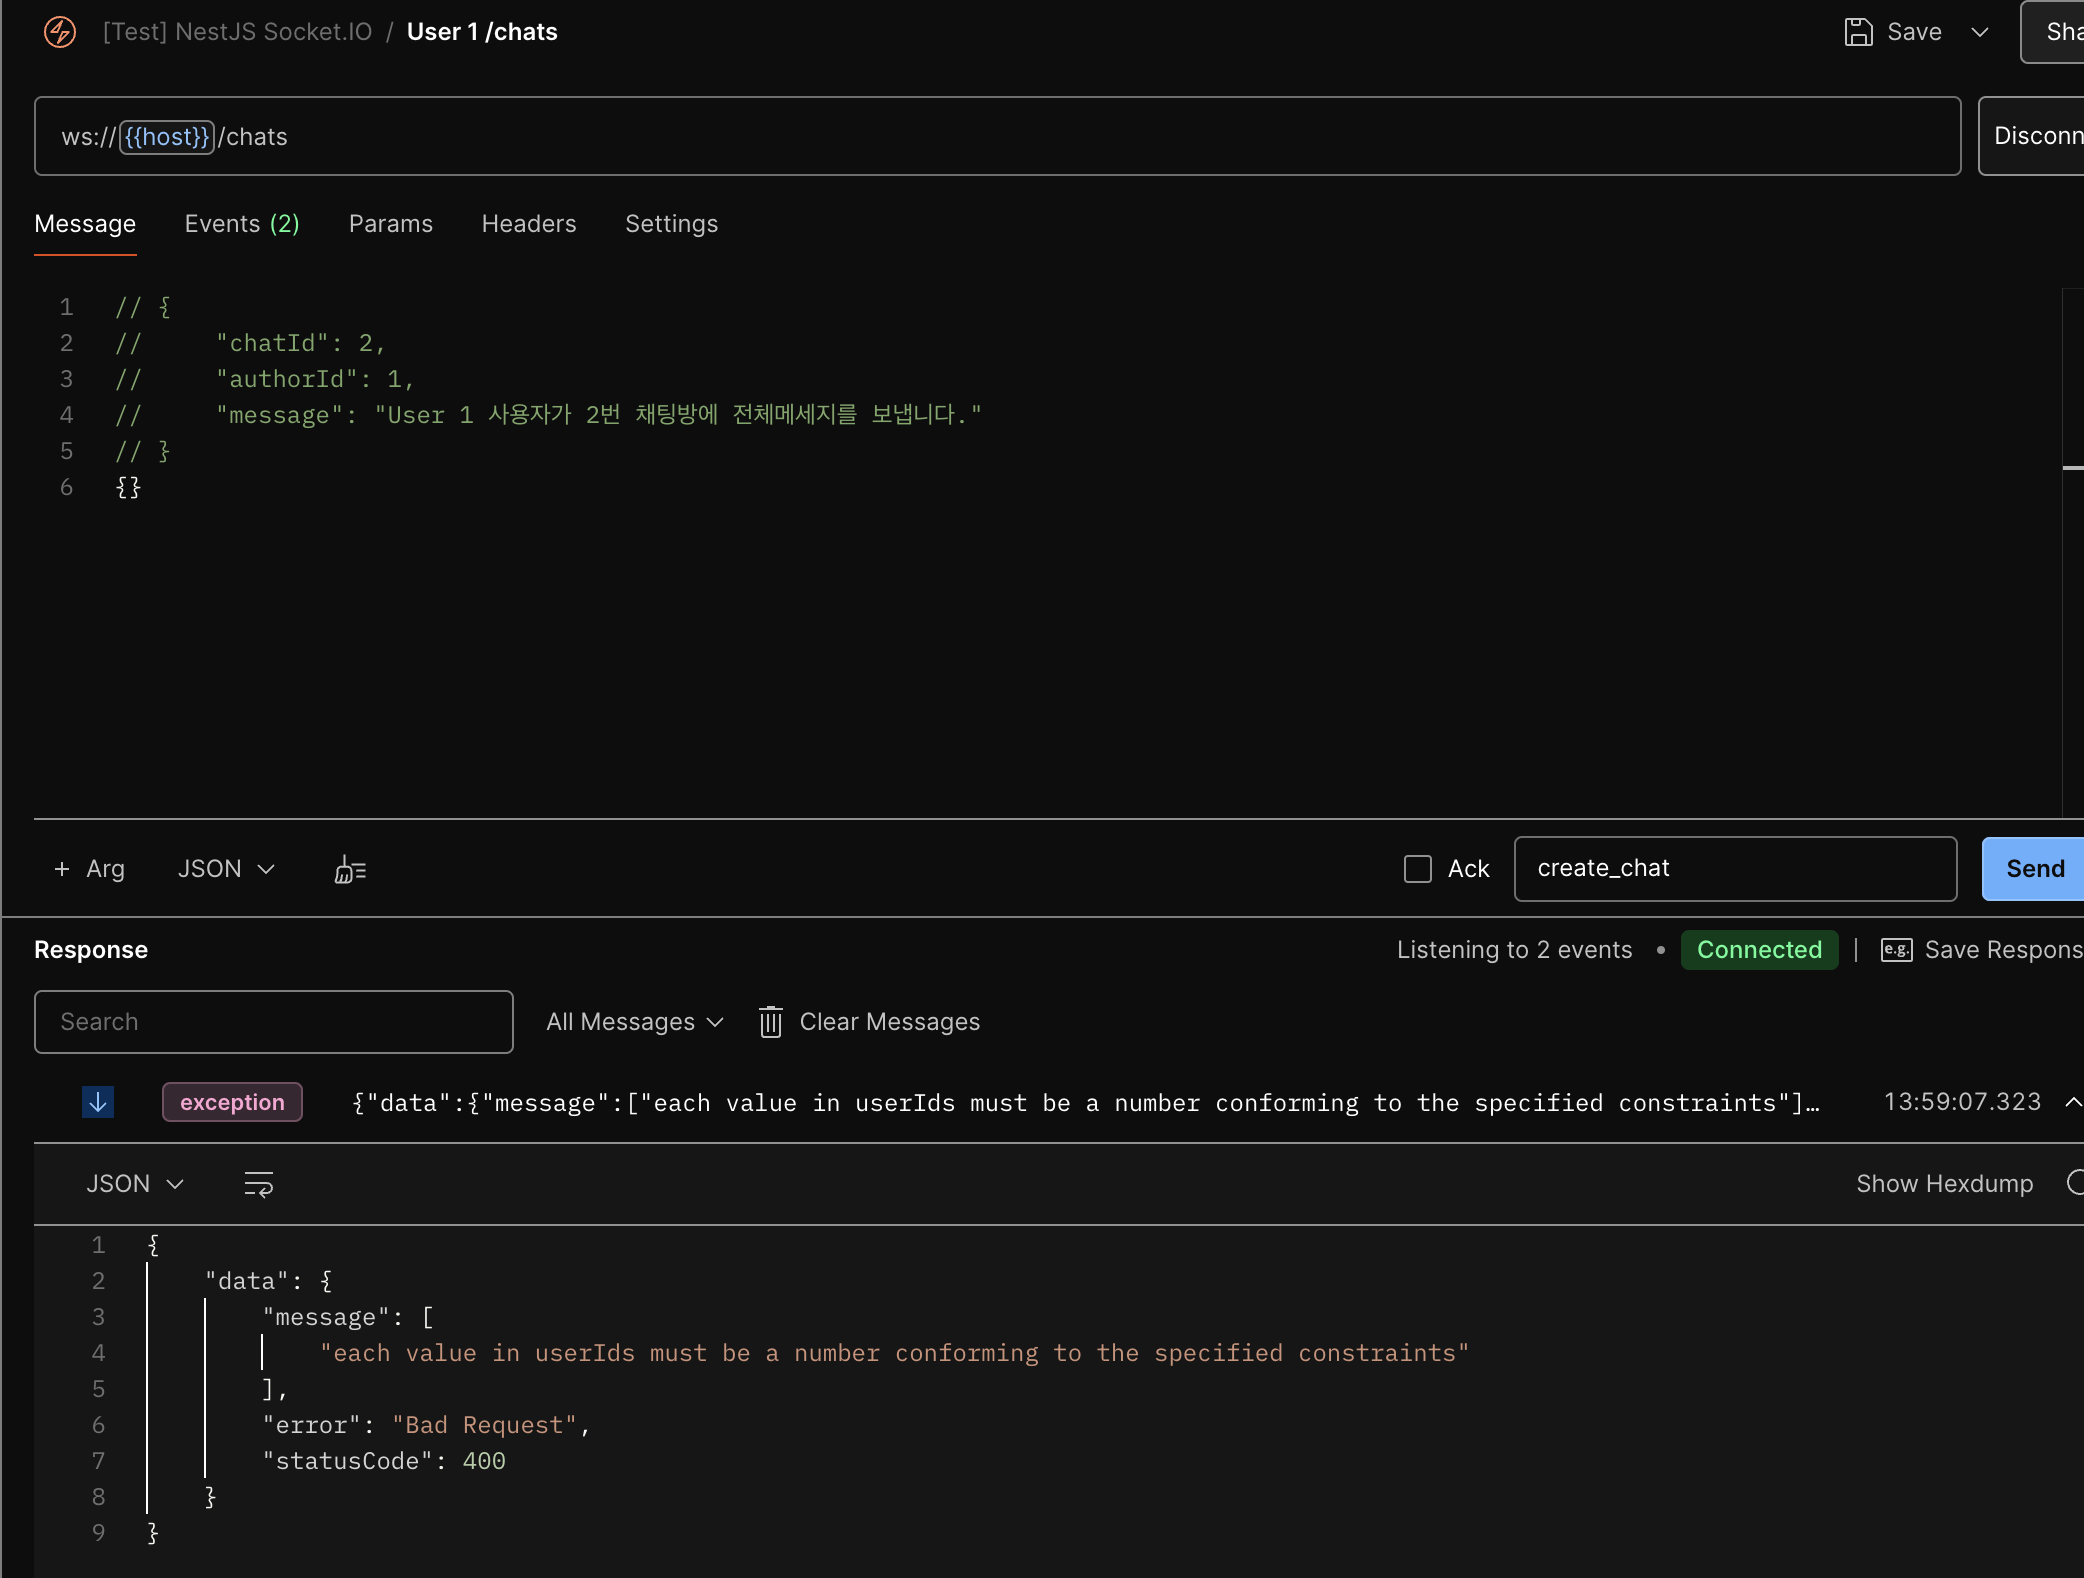
NestJS에서는 웹소켓의 에러도 HttpException으로 보내기 때문에, 위와 같이 HttpException을 받도록 작업할 수 있다.
@UsePipes(
    new ValidationPipe({
      transform: true,
      transformOptions: {
        enableImplicitConversion: true,
      },
      whitelist: true,
      forbidNonWhitelisted: true,
    }),
  )
@WebSocketGateway({
    // ws://localhost:3000/chats
    namespace: 'chats'
})
@UseFilters(WsErrorFilter)
export class ChatsGateway implements OnGatewayConnection {
구현한 Exception Filter를 ChatsGateway 클래스에 적용하면 해당 클래스내의 모든 통신에 Exception Filter를 적용할 수 있다.
3. Guard 적용하기
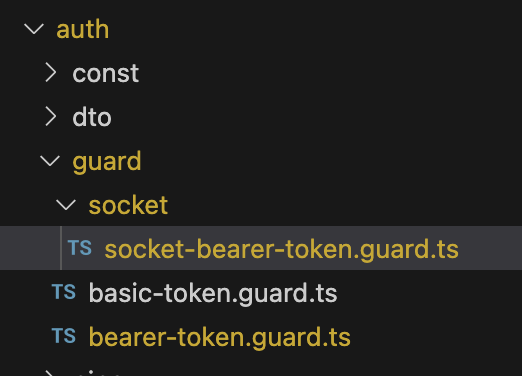
import { CanActivate, ExecutionContext, Injectable } from "@nestjs/common";
import { WsException } from "@nestjs/websockets";
import { AuthService } from "src/auth/auth.service";
import { UsersService } from "src/users/users.service";

@Injectable()
export class SocketBearerTokenGuard implements CanActivate {
    constructor(
        private readonly authService: AuthService,
        private readonly usersService: UsersService,
    ) {}

    async canActivate(context: ExecutionContext): Promise<boolean> {
        const socket = context.switchToWs().getClient();

        const headers = socket.handshake.headers;

        const rawToken = headers['authorization']

        if(!rawToken) {
            throw new WsException('토큰이 없습니다!');
        }

        try {
            const token = this.authService.extractTokenFromHeader(rawToken, true);

            const payload = await this.authService.verifyToken(token);
            const user = await this.usersService.getUserByEmail(payload.email);

            socket.user = user;
            socket.token = token;
            socket.tokenType = payload.tokenType;

            return true;
        } catch (error) {
            throw new WsException(`${error} : 토큰이 유효하지 않습니다.`);
        }
    }
}
일반적으로 사용자는 로그인을 한 후 채팅방에 '입장'하여 '메세지를 전송' 한다. 이 과정에서 입장과 전송 등에도 로그인과 같이 Guard를 적용하여 AccessToken의 유효여부를 판단할 수 있다.
@Module({
  imports: [
    TypeOrmModule.forFeature([ChatsModel, MessagesModel]),
    CommonModule,
    AuthModule,
    UsersModule,
],ChatGateway에서 UsersService를 사용하므로 chats.module.ts에 UsersModule을 등록해준다.
@UseGuards(SocketBearerTokenGuard)
    @SubscribeMessage('create_chat')
    async createChat(
        @MessageBody() data: CreateChatDto,
        @ConnectedSocket() socket: Socket & {user: UsersModel},
    ) {
        const chat = await this.chatsService.createChat(
            data,
        );
    }
이제 원하는 통신에 Guard를 적용할 수 있다.
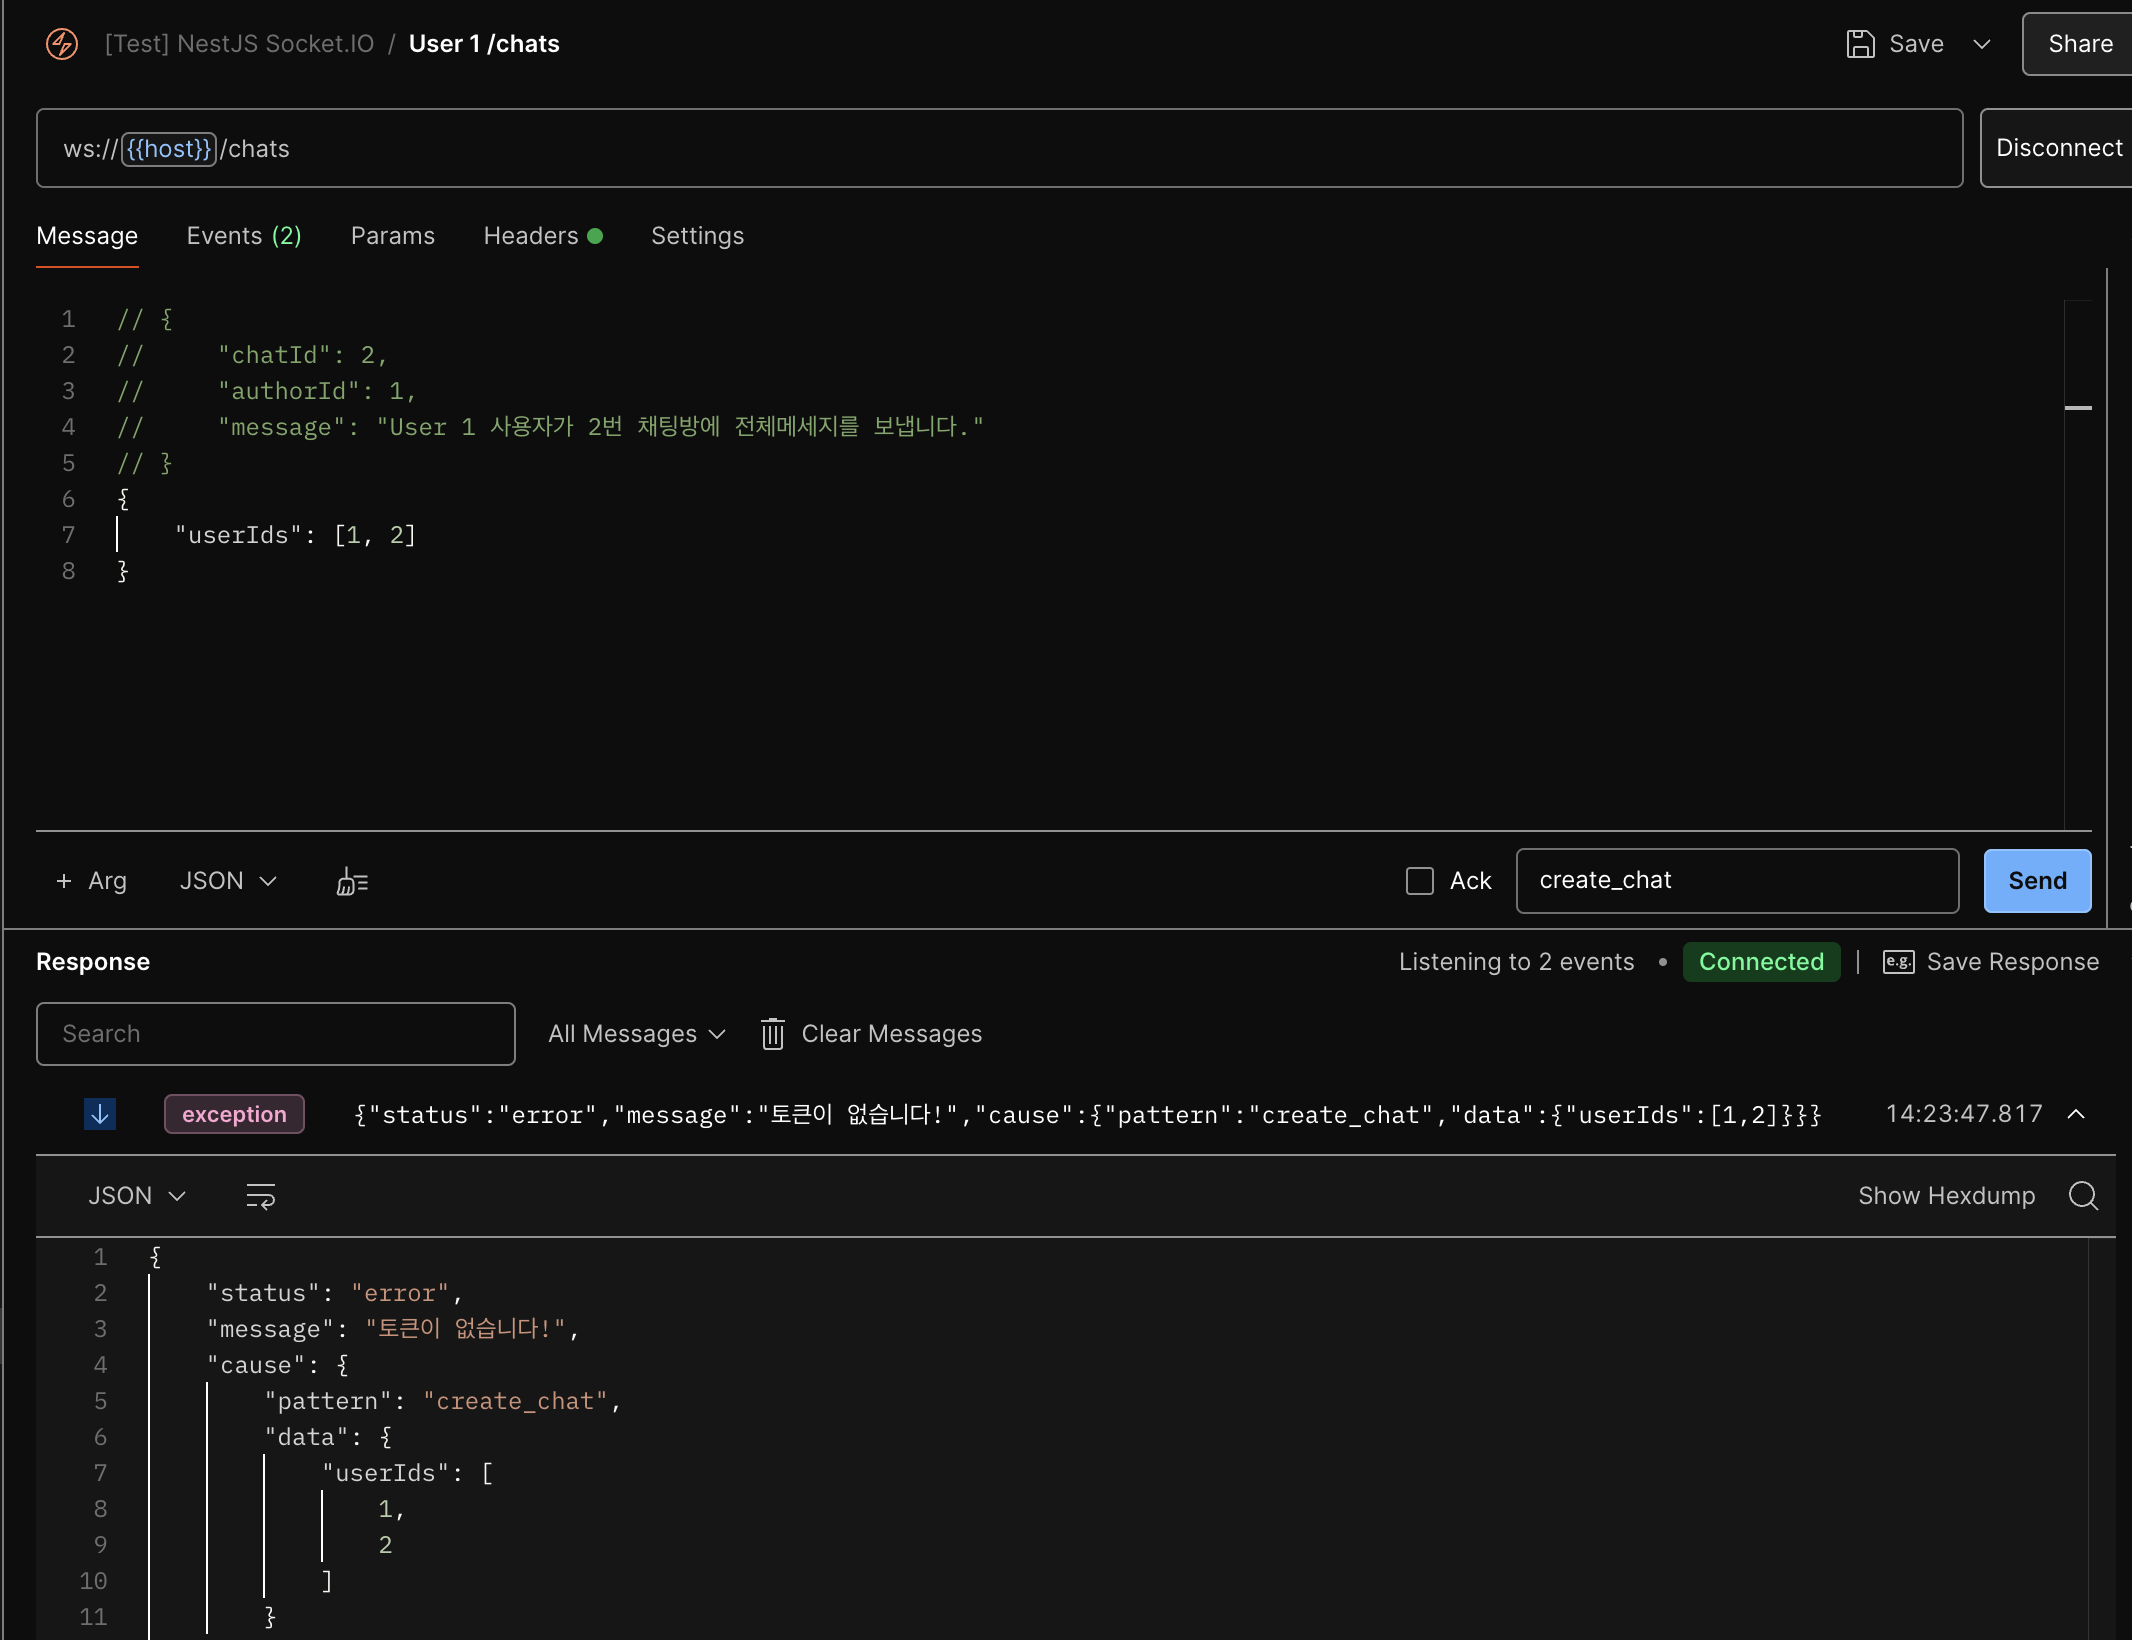

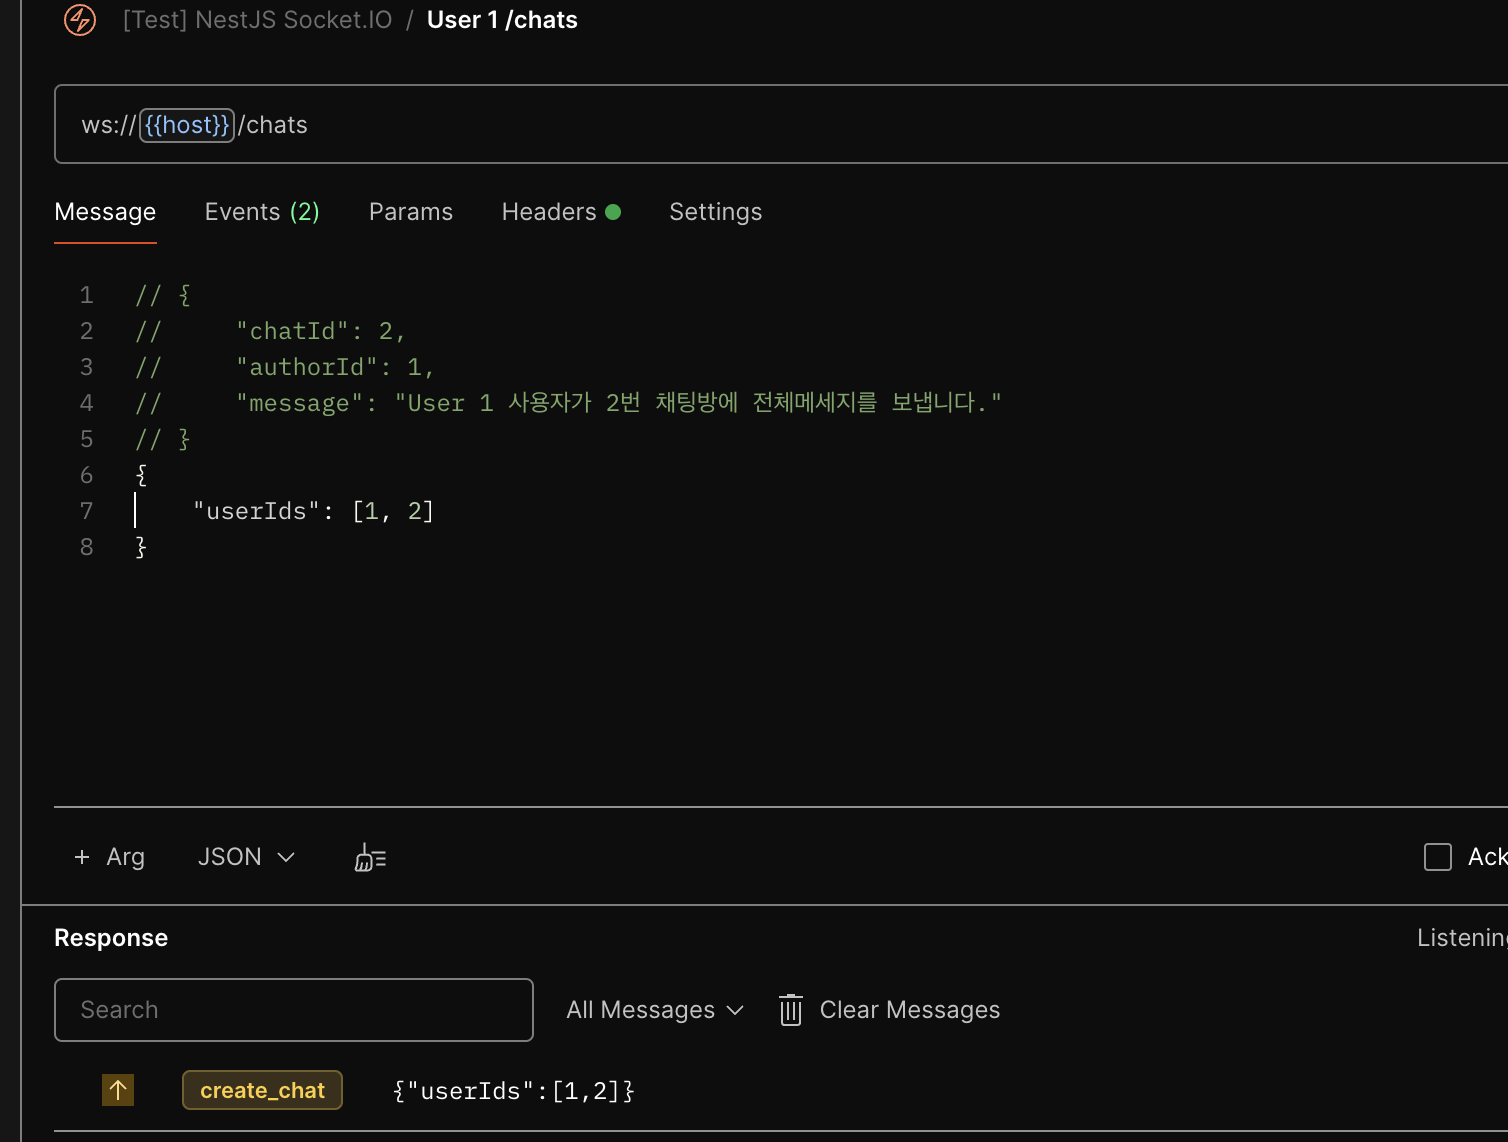
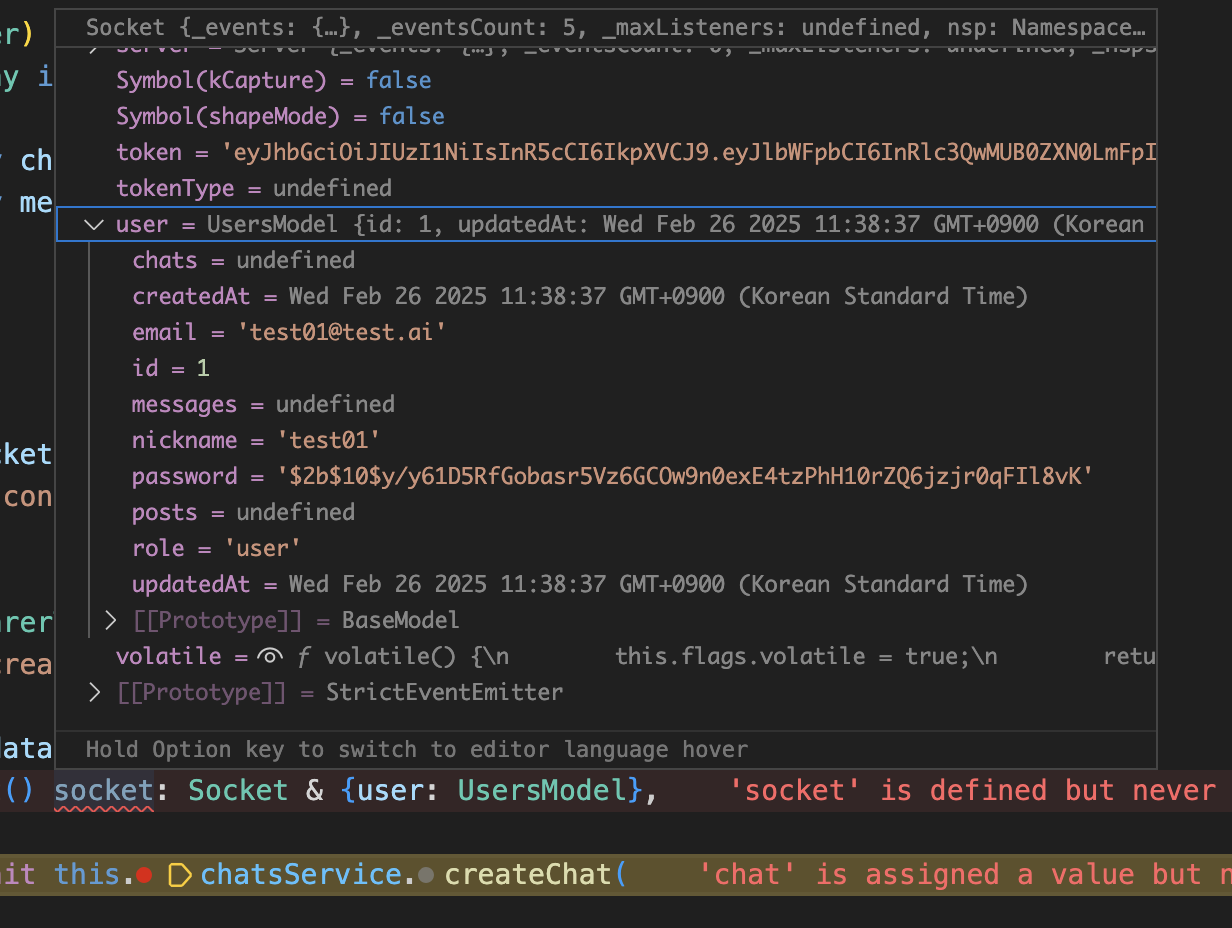
또한 Guard를 통해 SocketBearerTokenGuard 가 실행되며 socket.user에 UsersModel을 넣었으므로, socket에는 user가 있다는 것을 알 수 있다.
디버깅을 해보면 실제 UsersModel이 들어가 있는 것을 볼 수 있다.
4. sendMessage 데코레이터 기반으로 로직 변경하기
Guard에서 socket.user에 UsersModel을 넣었기 때문에 dto를 통해서, 즉 클라이언트에서 authorId를 넣어줄 필요가 없어진다.
import { PickType } from "@nestjs/mapped-types";
import { MessagesModel } from "../entity/messages.entity";
import { IsNumber } from "class-validator";

export class CreateMessagesDto extends PickType(MessagesModel, [
    'message',
]) {
    @IsNumber()
    chatId: number;
}
CreateMessageDto에서 authorId를 제거한다.
@UseGuards(SocketBearerTokenGuard)
    @SubscribeMessage('send_message')
    async sendMessage(
        @MessageBody() dto: CreateMessagesDto,
        @ConnectedSocket() socket: Socket & {user: UsersModel},
    ) {
        const chatExists = await this.chatsService.checkIfChatExists(dto.chatId);

        if(!chatExists) {
            throw new WsException({
                code: 100,
                message: `존재하지 않는 chat 입니다. chatId: ${dto.chatId}`,
            });
        }

        const message = await this.messagesService.createMessage(dto, socket.user.id) as MessagesModel;

        // broadcast
        socket.to(message.chat.id.toString()).emit('receive_message', message.message);

        // room 통신
        // this.server.in(message.chatId.toString()).emit('receive_message', message.message);
    }
sendMessage 메서드에서 createMessage에 socket.user.id 를 넣어준다.
async createMessage(
        dto: CreateMessagesDto,
        authorId: number,
    ) {
        const message = await this.messagesRepository.save({
            chat: {
                id: dto.chatId,
            },
            author: {
                id: authorId,
            },
            message: dto.message,
        });

        return this.messagesRepository.findOne({
            where: {
                id: message.id,
            },
            relations: {
                chat: true,
            }
        });
}createMessage의 매개변수로 authorId를 설정하고, dto.authorId를 authorId로 변경한다.
5. AccessToken을 매번 검증할 때의 문제
채팅방에 '입장' 하거나 메세지를 '전송'하거나 하는 등에서 Guard를 사용하며, AccessToken을 검증하도록 구현하였는데 이것에는 문제가 있다.

우선 연결하면 authorization의 값의 변경이 불가능하다.
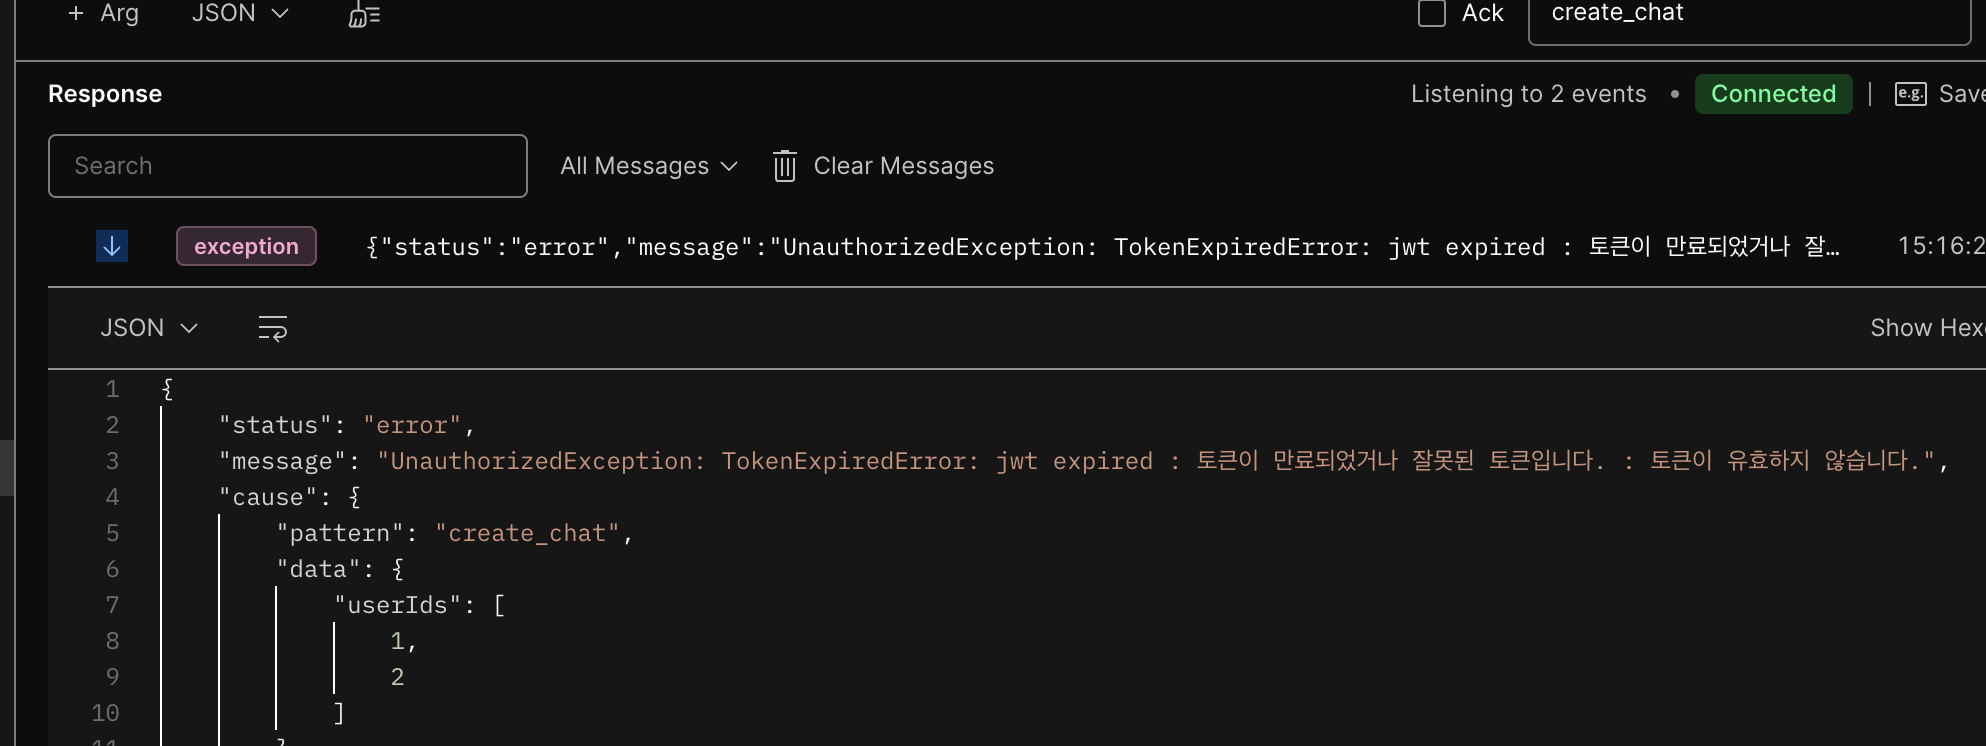
경과가 지나면 토큰이 만료되어 에러를 발생한다.
6. Socket에 사용자 정보 저장하기
async handleConnection(socket: Socket & {user: UsersModel}) {
        console.log(`on connect called : ${socket.id}`);

        const headers = socket.handshake.headers;

        // Bearer xxxxxx
        const rawToken = headers['authorization'] as string;

        if (!rawToken) {
            socket.disconnect();
        }

        try {
            const token = this.authService.extractTokenFromHeader(
                rawToken,
                true,
            );

            const payload = this.authService.verifyToken(token);
            const user = await this.usersService.getUserByEmail(payload.email) as UsersModel;

            socket.user = user;

            return true;
        } catch (e) {
            console.log(e);
            socket.disconnect();
        }
    }
AccessToken을 Guard로 만들어 적용하는 것의 문제점을 보완하기 위해 기존 Guard를 적용했던 것들을 제거하고, handleConnection 메서드에 SocketBearerTokenGuard 에 작성되었던 내용들을 적용한다.
조금 다른 부분은 문제가 생겼을 경우 socket.disconnect();로 소켓의 연결을 해제하는 것이다.
참고로 handleConnection은 소켓이 연결된 직후 호출되는 메서드이다.
7. Gateway Lifecycle Hooks
@UsePipes(
    new ValidationPipe({
      transform: true,
      transformOptions: {
        enableImplicitConversion: true,
      },
      whitelist: true,
      forbidNonWhitelisted: true,
    }),
  )
@WebSocketGateway({
    // ws://localhost:3000/chats
    namespace: 'chats'
})
@UseFilters(WsErrorFilter)
export class ChatsGateway implements OnGatewayConnection, OnGatewayInit, OnGatewayDisconnect {
    constructor(
        private readonly chatsService: ChatsService,
        private readonly messagesService: ChatsMessagesService,
        private readonly authService: AuthService,
        private readonly usersService: UsersService,
    ) {}

    @WebSocketServer()
    server: Server;

    afterInit(server: any) {
        console.log(`${server} after gateway init`);
    }

    handleDisconnect(socket: Socket) {
        console.log(`on disconnect called : ${socket.id}`);
    }
이외에도 OnGatewayInit, OnGatewayDisconnect를 사용하여, 연결 직후 호출(afterInit)이나 연결이 끊겼을 때 호출되는 메서드(handleDisconnect)를 구현할 수 있다.
'NestJS' 카테고리의 다른 글
| [NestJS] RBAC (Role Base Access Controll) (0) | 2025.03.13 |
|---|---|
| [NestJS] 모듈 네스팅 (0) | 2025.03.12 |
| [NestJS] SocketIO 일반 (0) | 2025.03.12 |
| [NestJS] Middleware (0) | 2025.03.11 |
| [NestJS] Exception Filter (0) | 2025.03.10 |


